During my talk at the Seadays 2024 as a part of my talk I demonstrated how in a project I used SeaTable as a backend to configure data, like the logo and footer, of a PDF template and promised to share some more information. I was recently made aware that I forgot to share the setup and workflow. Sorry, I was a bit nervous and forgot to write it down. So here is the promised setup, a few months later.
What is Gotenberg?
Before we dive into the workflow, let me quickly explain what Gotenberg is for those who might not be familiar with it.
Gotenberg is a Docker-powered stateless API for converting HTML, Markdown, and Office documents to PDF. Think of it as a web service that takes your HTML (with CSS) and spits out a properly formatted PDF - no more dealing with complex PDF libraries or wrestling with formatting issues.
Why is this useful? Well, if you’ve ever tried to generate PDFs programmatically, you know it can be a pain. Gotenberg handles all the heavy lifting for you. You just send it your HTML via a simple HTTP POST request, and it returns a beautiful PDF. It uses Chrome under the hood, so your PDFs will look exactly like they would in a browser - which means your CSS will work as expected. The best part? It’s completely stateless, so you can run it in a container, scale it up or down as needed, and it won’t store anything on disk. Perfect for automation workflows like what we’re building with n8n.
For this tutorial, I’m using the demo installation at https://demo.gotenberg.dev/, but I’d highly recommend setting up your own instance for production use. It’s just a simple Docker container, so deployment is straightforward.
SeaTable Setup
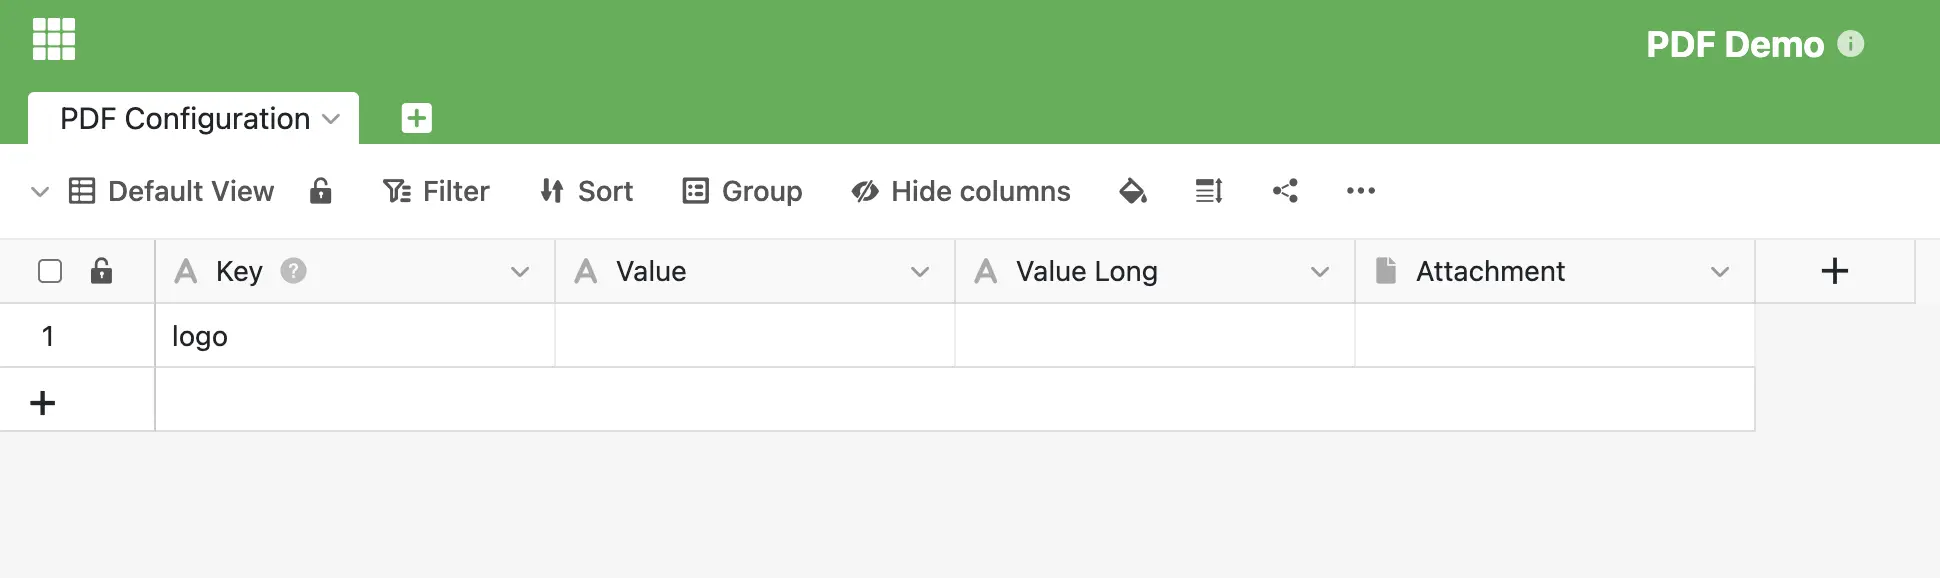
The SeaTable setup is very simple. All you need is just a single table, let’s call it PDF Configuration and a few columns. (Or download the SeaTable Base and import it into your SeaTable instance).
This will be treated similar to a key/value store where we have the key (for example logo), and a value (the logo file).
It also has two different kind of value fields, a Value and Value Long. The reason for this will be shown in more detail later, but in short, if you have a Value like a company name or address, you most likely will not need any custom formatting that SeaTable offers (bold, underline, newlines etc.) so a normal text field is enough, because you can’t format anything or have newlines in a text field in SeaTable.
If however you require more text, want to add formatting to it - think of the footer of an invoice for example - where you need newlines, bold text etc, then this is a perfect use case for the Value Long field where you have all formatting options from SeaTable.
You could argue that you can just use the Value Long and not format anything. But here’s the thing. Users will see the text area field, and start adding formatted text and if your workflow in n8n isn’t handling it, you will have some very unexpected results on your PDF, but let’s not get ahead here and take it step by step.
n8n workflow
With this very simple SeaTable Base, let’s go to the n8n flow. Let’s start with the basics. Let’s assume you’re trying to create a invoice system based on SeaTable and using n8n + Gotenberg to create the pdf.
Creating an invoice template
First you need a invoice template. For this example you can use this simple template to get you started. It is just static HTML, no Logo, no placeholders, just html + css.
Creating a first PDF
Import the first workflow from the GitHub repo this will look like this. It uses the demo installation of Gotenberg. I would highly recommend you setup your own Gotenberg but for the sake of demonstration let’s go with the public demo installation.
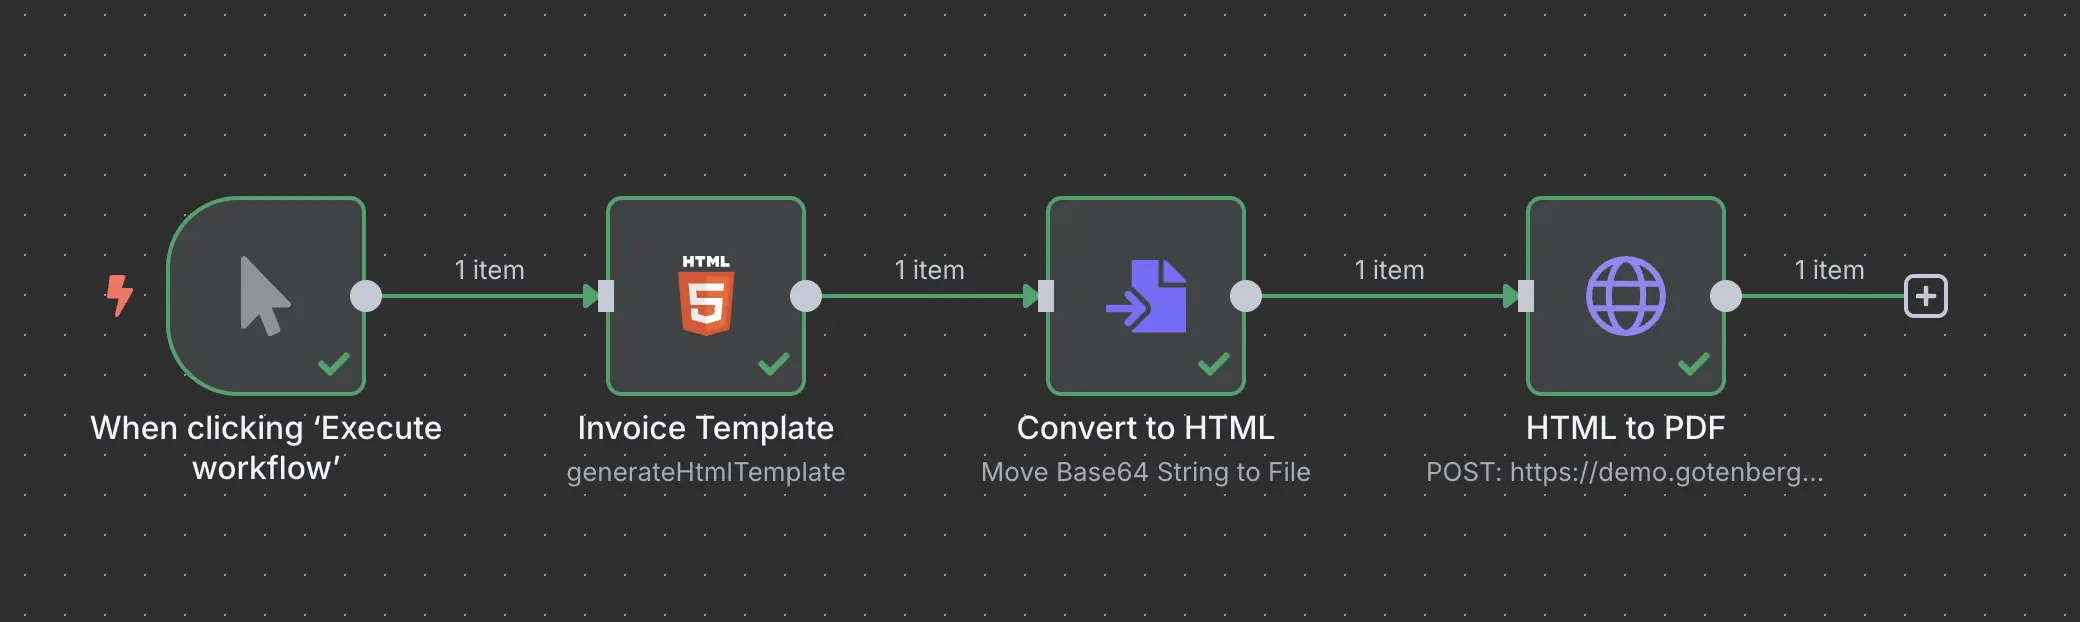
Let’s break it down.
HTML to binary data
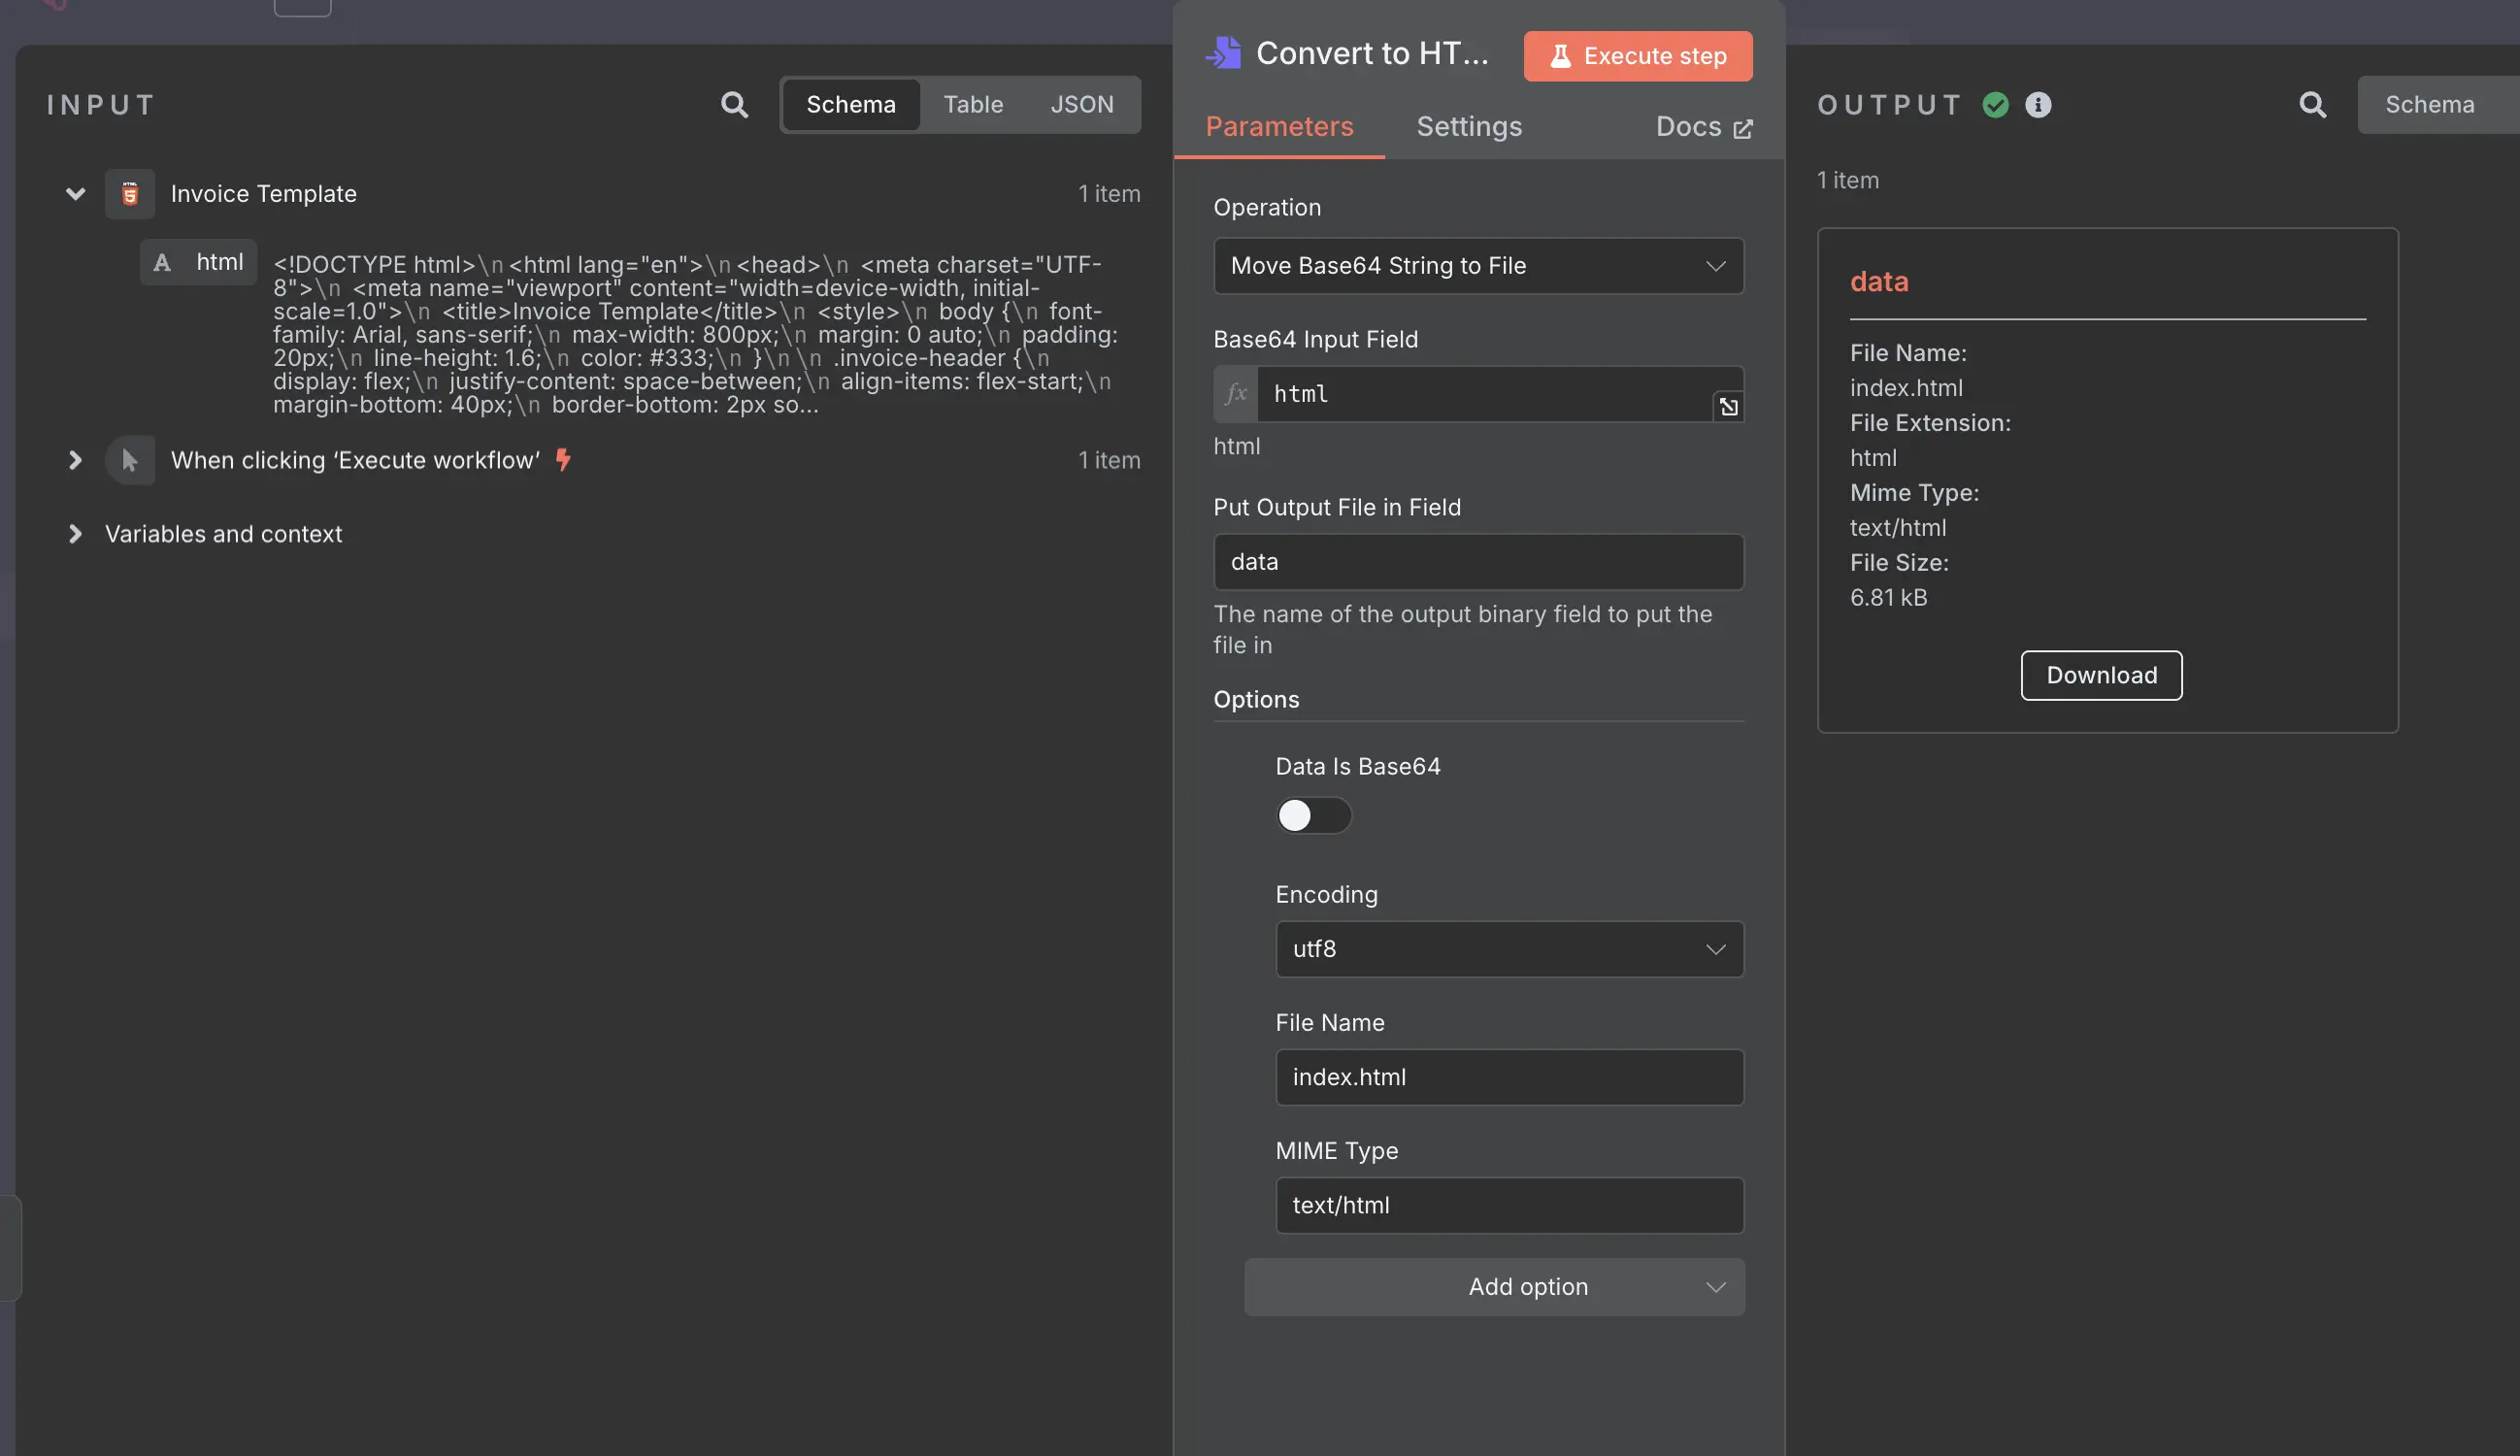
The Invoice Template just takes the HTML provided in the invoice template and feeds it without any modifications to the next node that will convert it to a file. The reason you have to do this is because Gotenberg expects a binary file as form data in a POST request to convert the html to PDF.
All this does is take the html from the html input field and saves it as binary data in the data field with the filename index.html
Converting HTML to PDF
Now this binary data will be passed on to the HTTP Request node which sends a HTTP POST request to Gotenberg.
Here you need to define the URL https://demo.gotenberg.dev/forms/chromium/convert/html and send the body as Form-Data with the previously created binary data.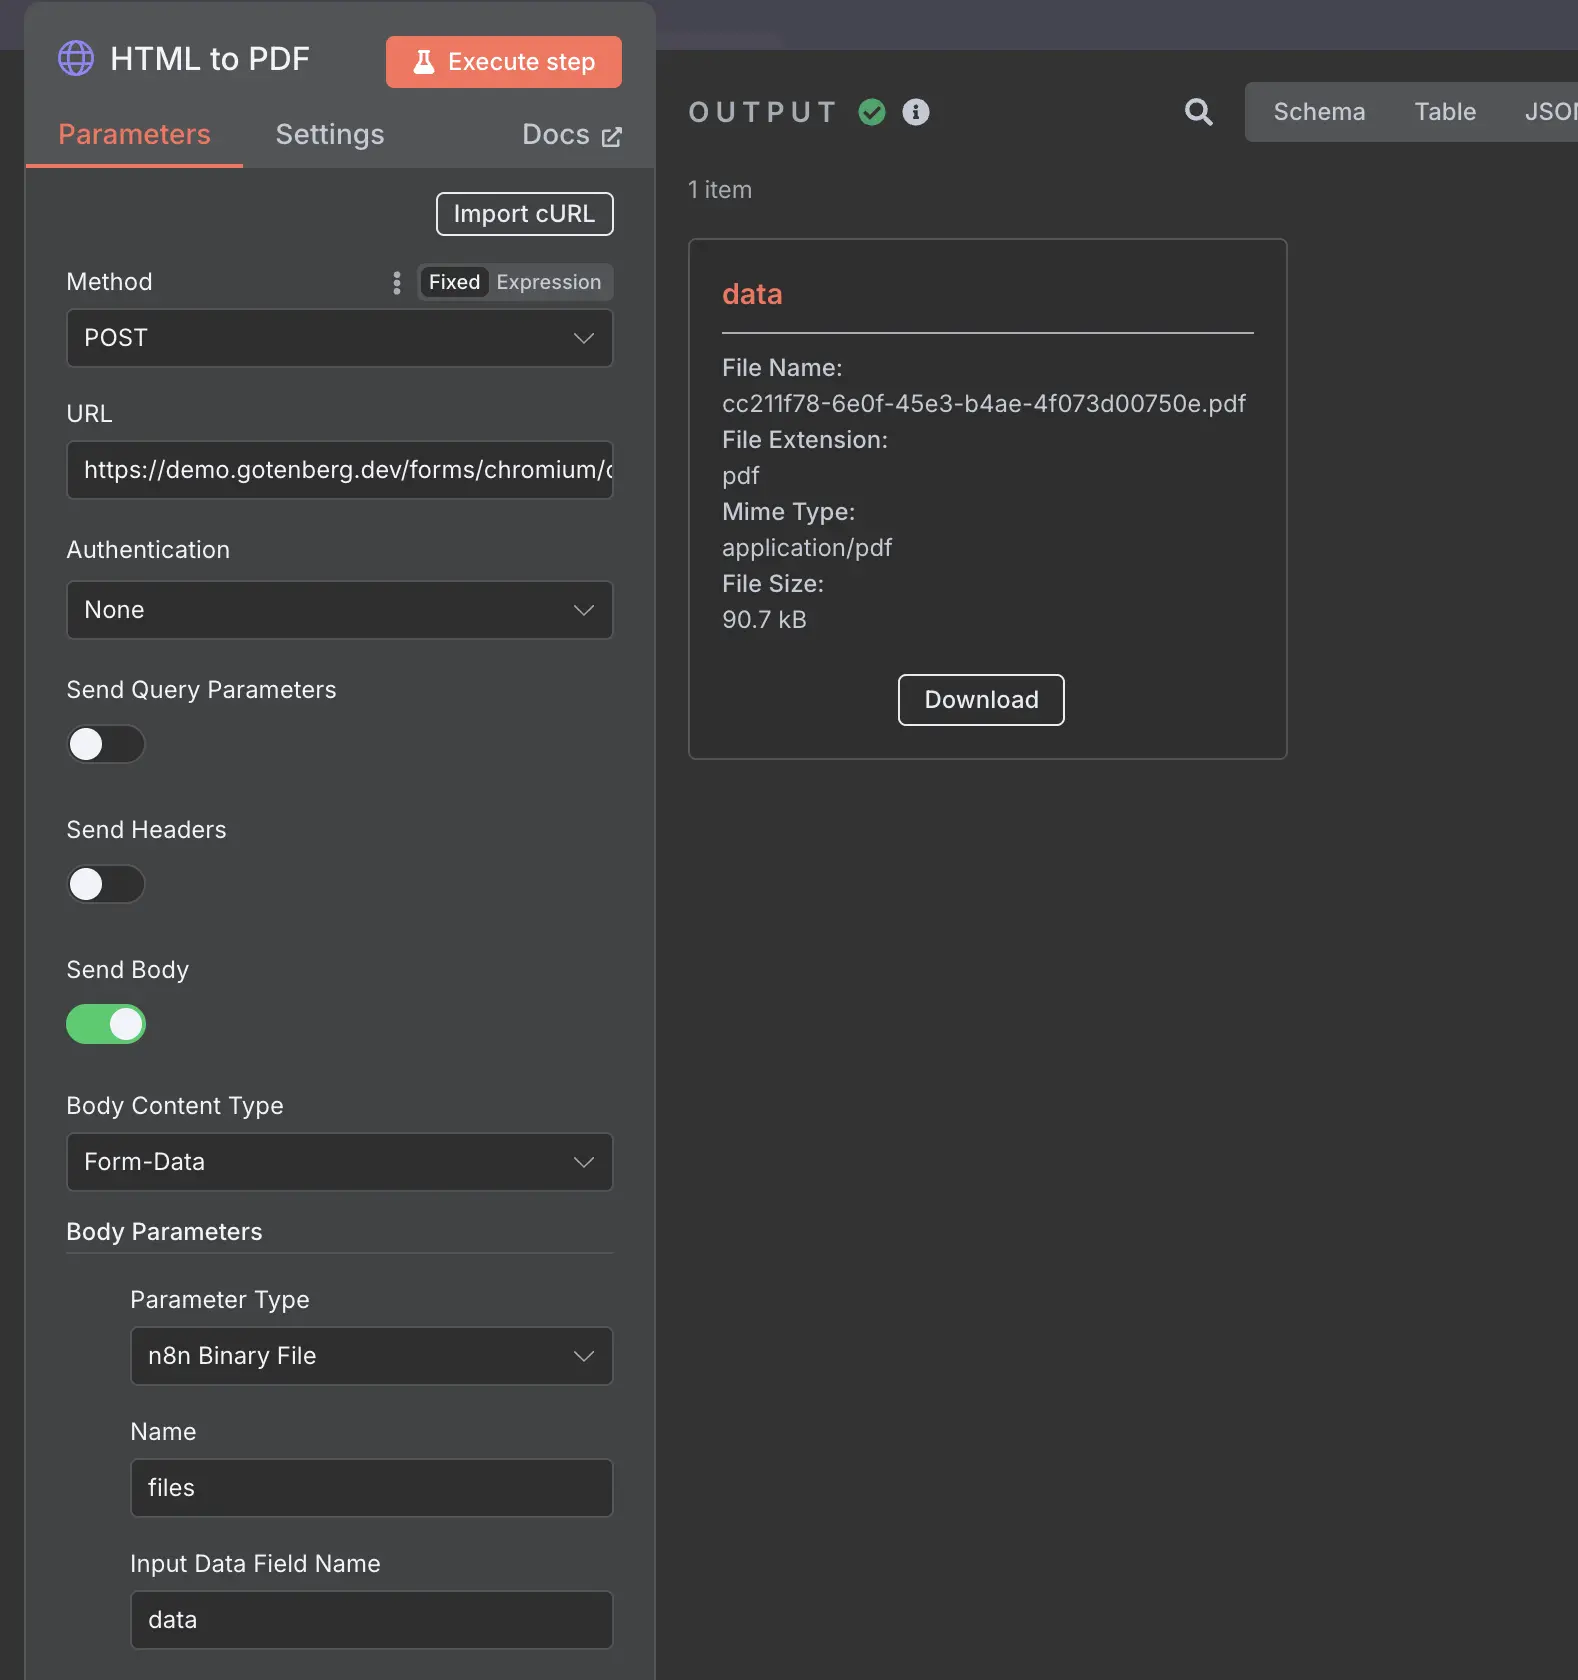
Gotenberg will then return a PDF which you could also download from n8n. So far so good, but … this is a bit boring and not quite the goal of this post. Babysteps … one step after the other, I’m getting there.
Adding the logo
Before you can actually add the logo, you need to connect n8n to SeaTable and for this you need an API key from SeaTable.
Prepare the API
Create an API key in SeaTable
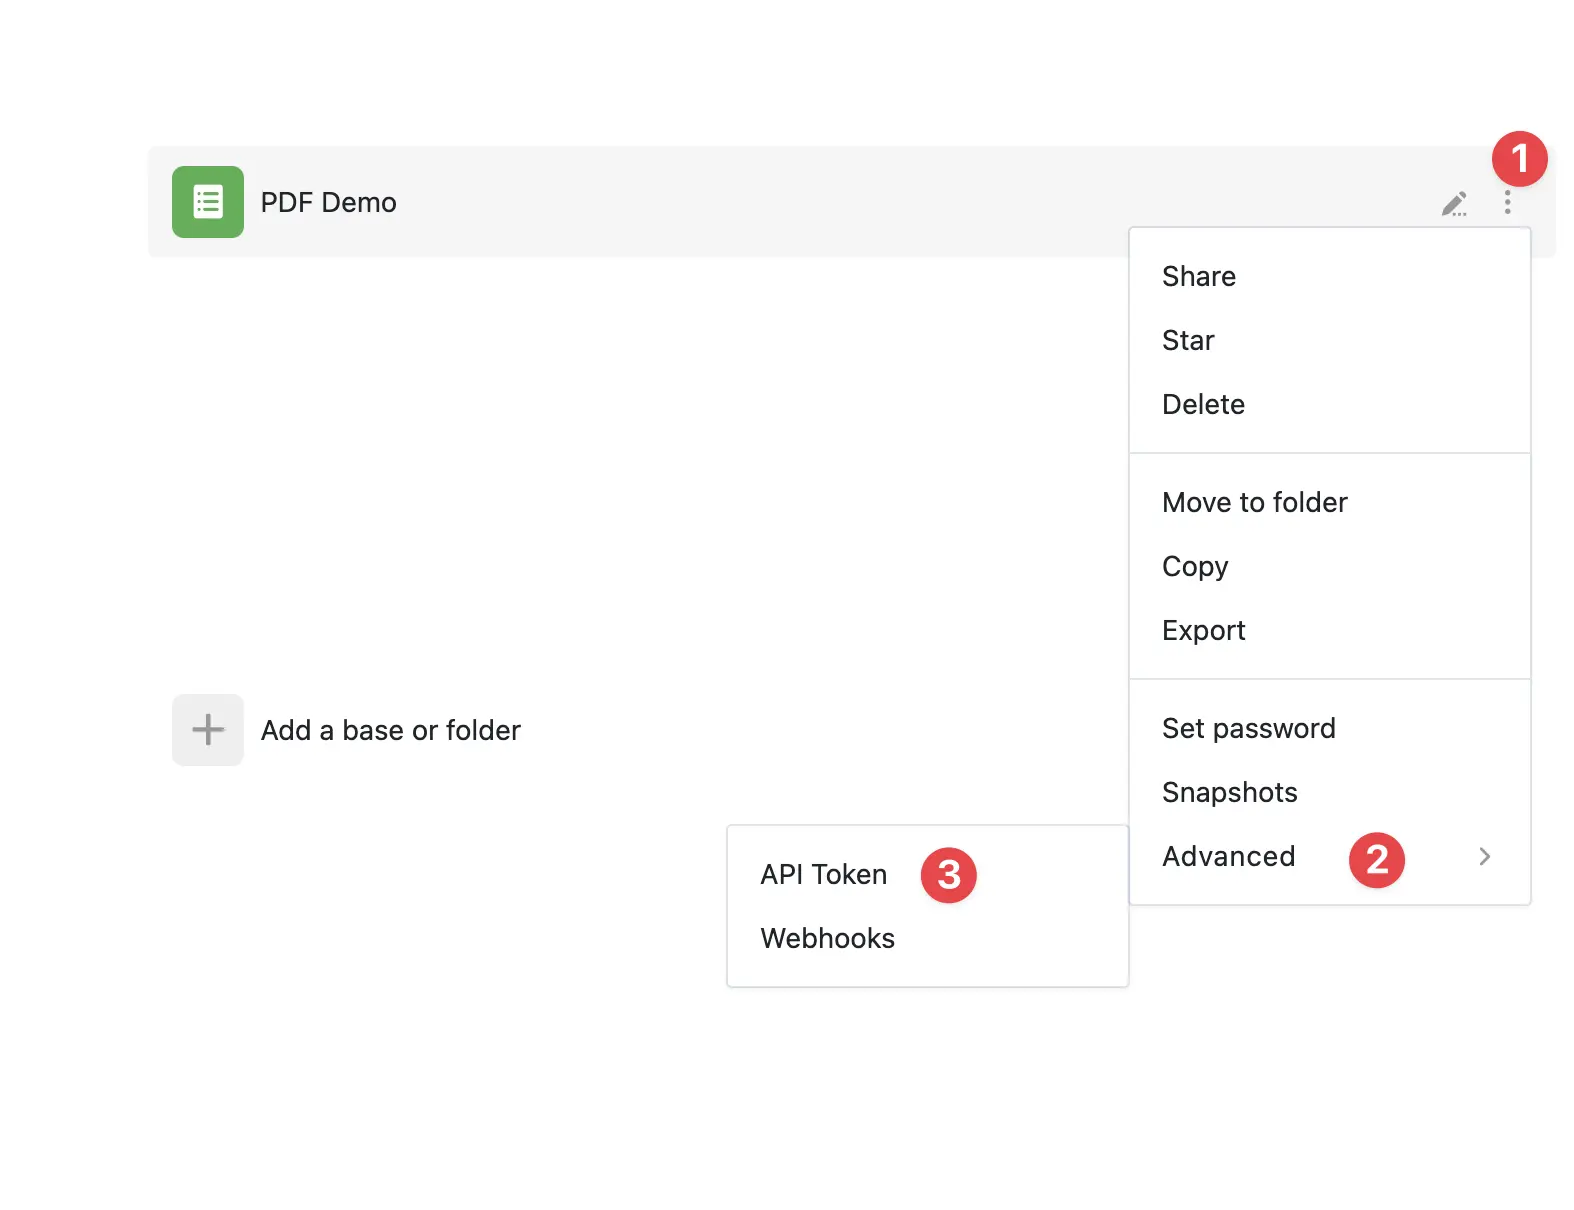
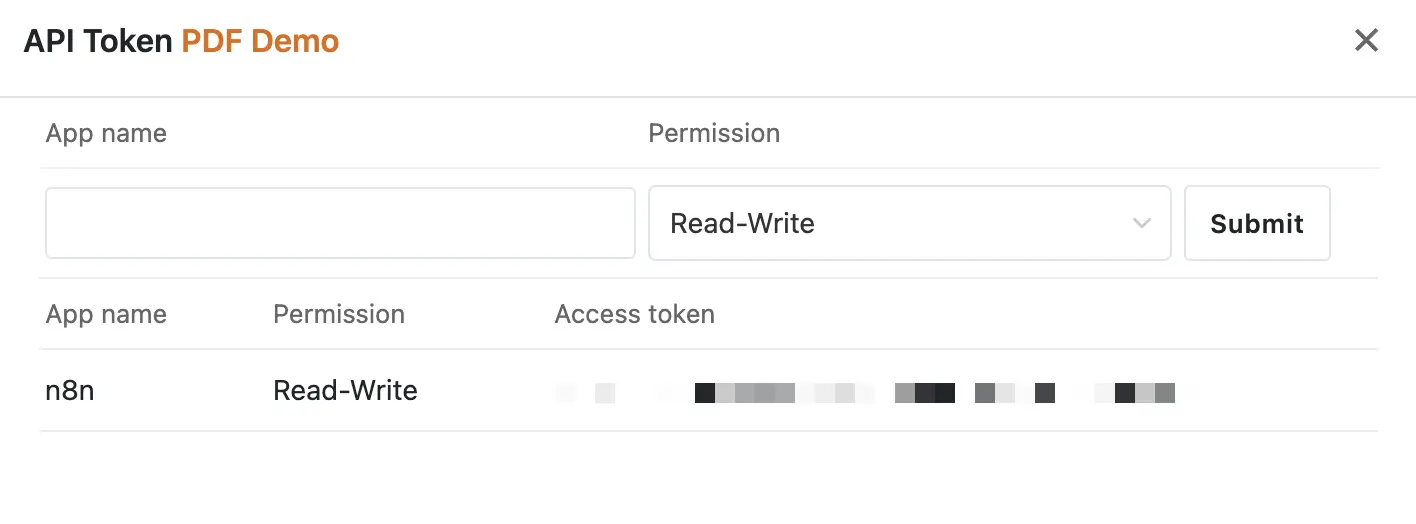
To create an API key, go to the base → advanced → API Token
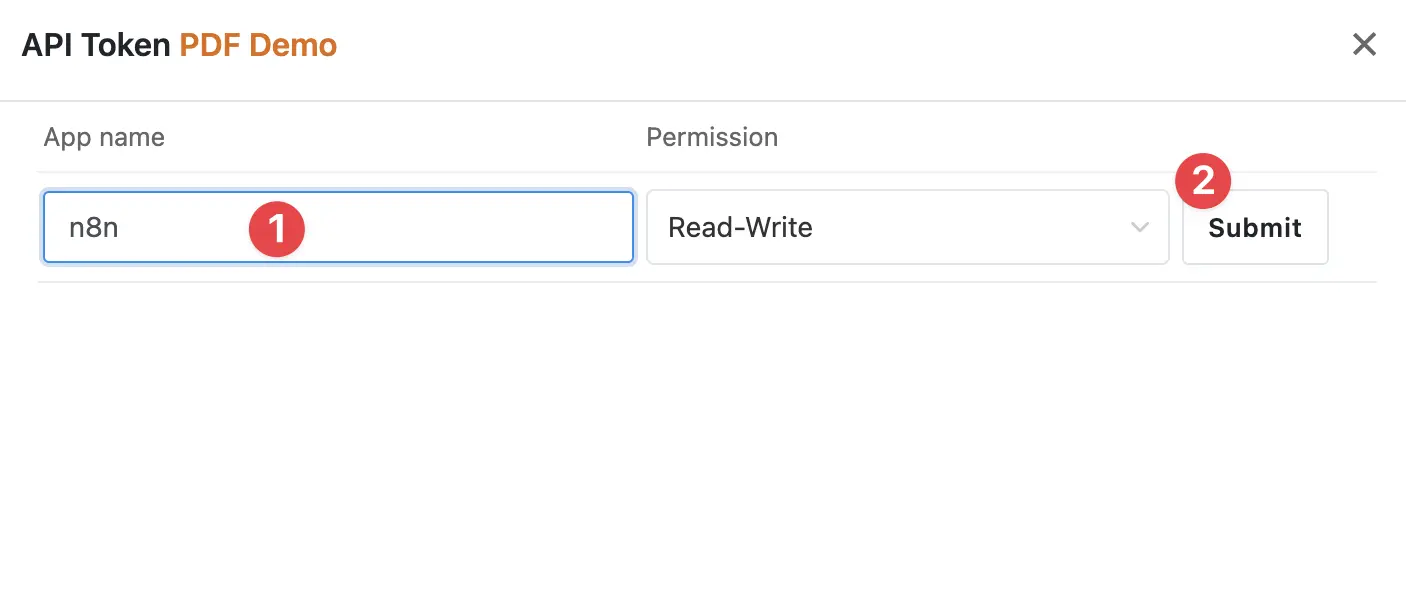
Give it a name and click submit. If you do not intend to write anything to SeaTable, you can also set the permission to read only.
Now take the API key; we’ll add it to n8n when we get to the SeaTable node.
Add the key to n8n
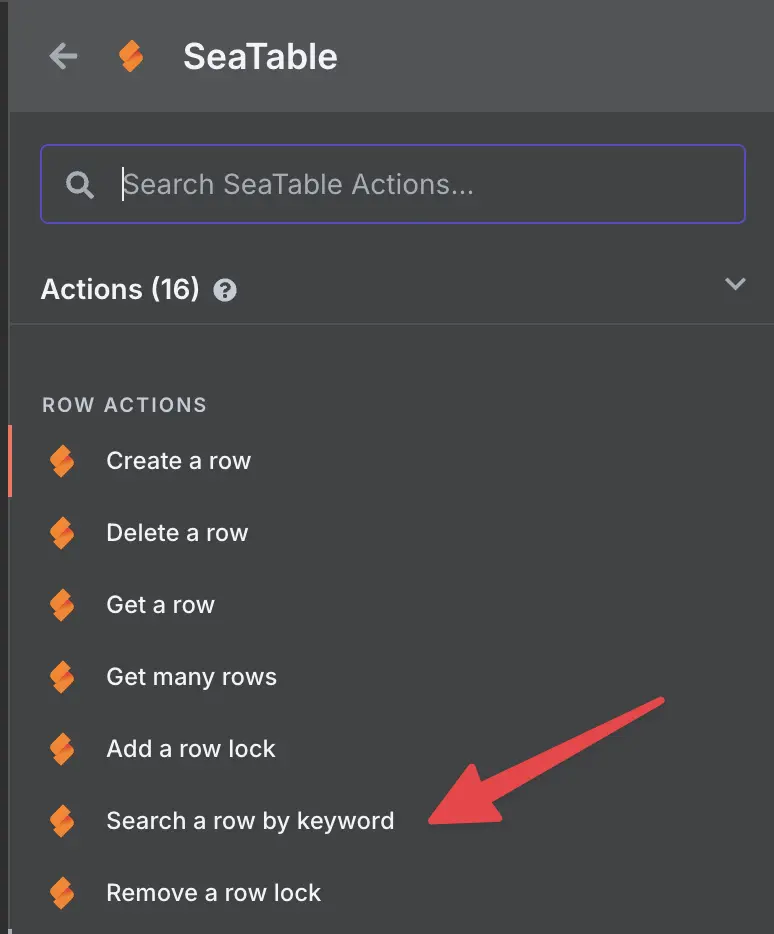
Add a SeaTable node in your n8n workflow with the row action Search a row by keyword
Create a new credential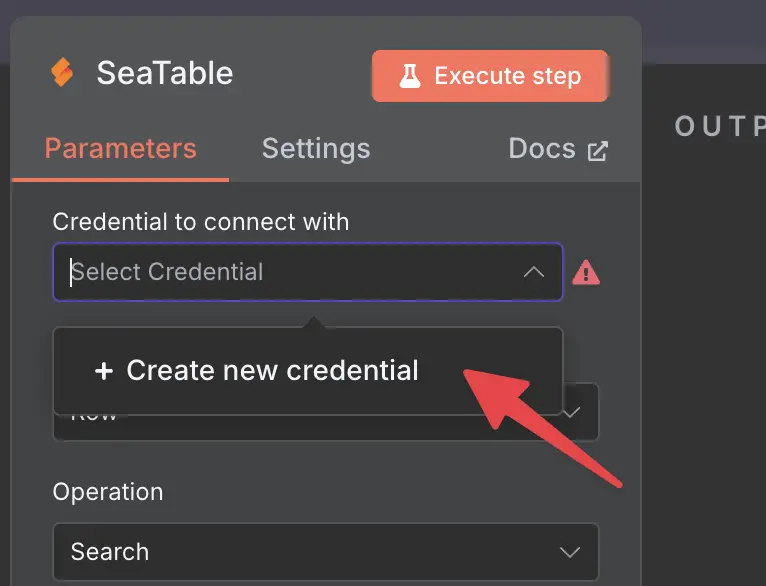
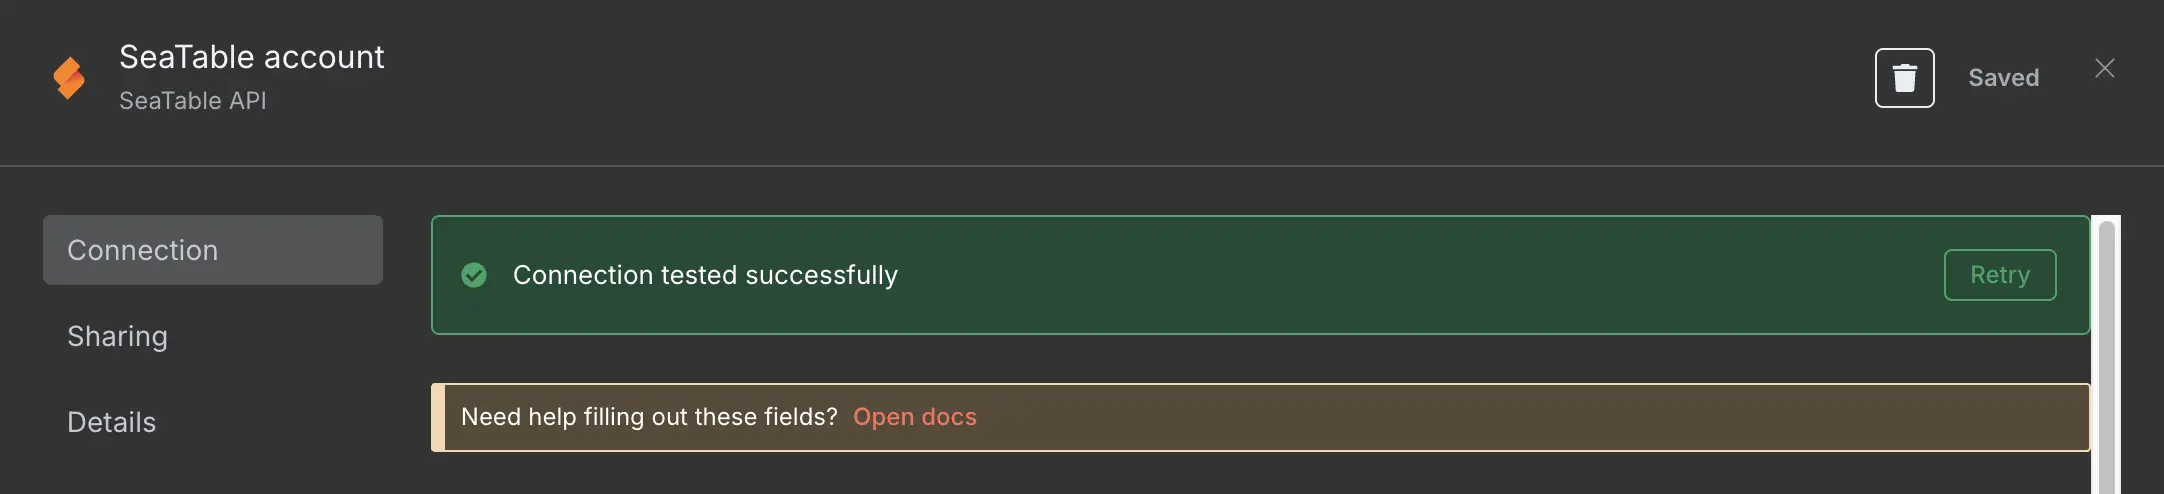
Inserting your SeaTable API key here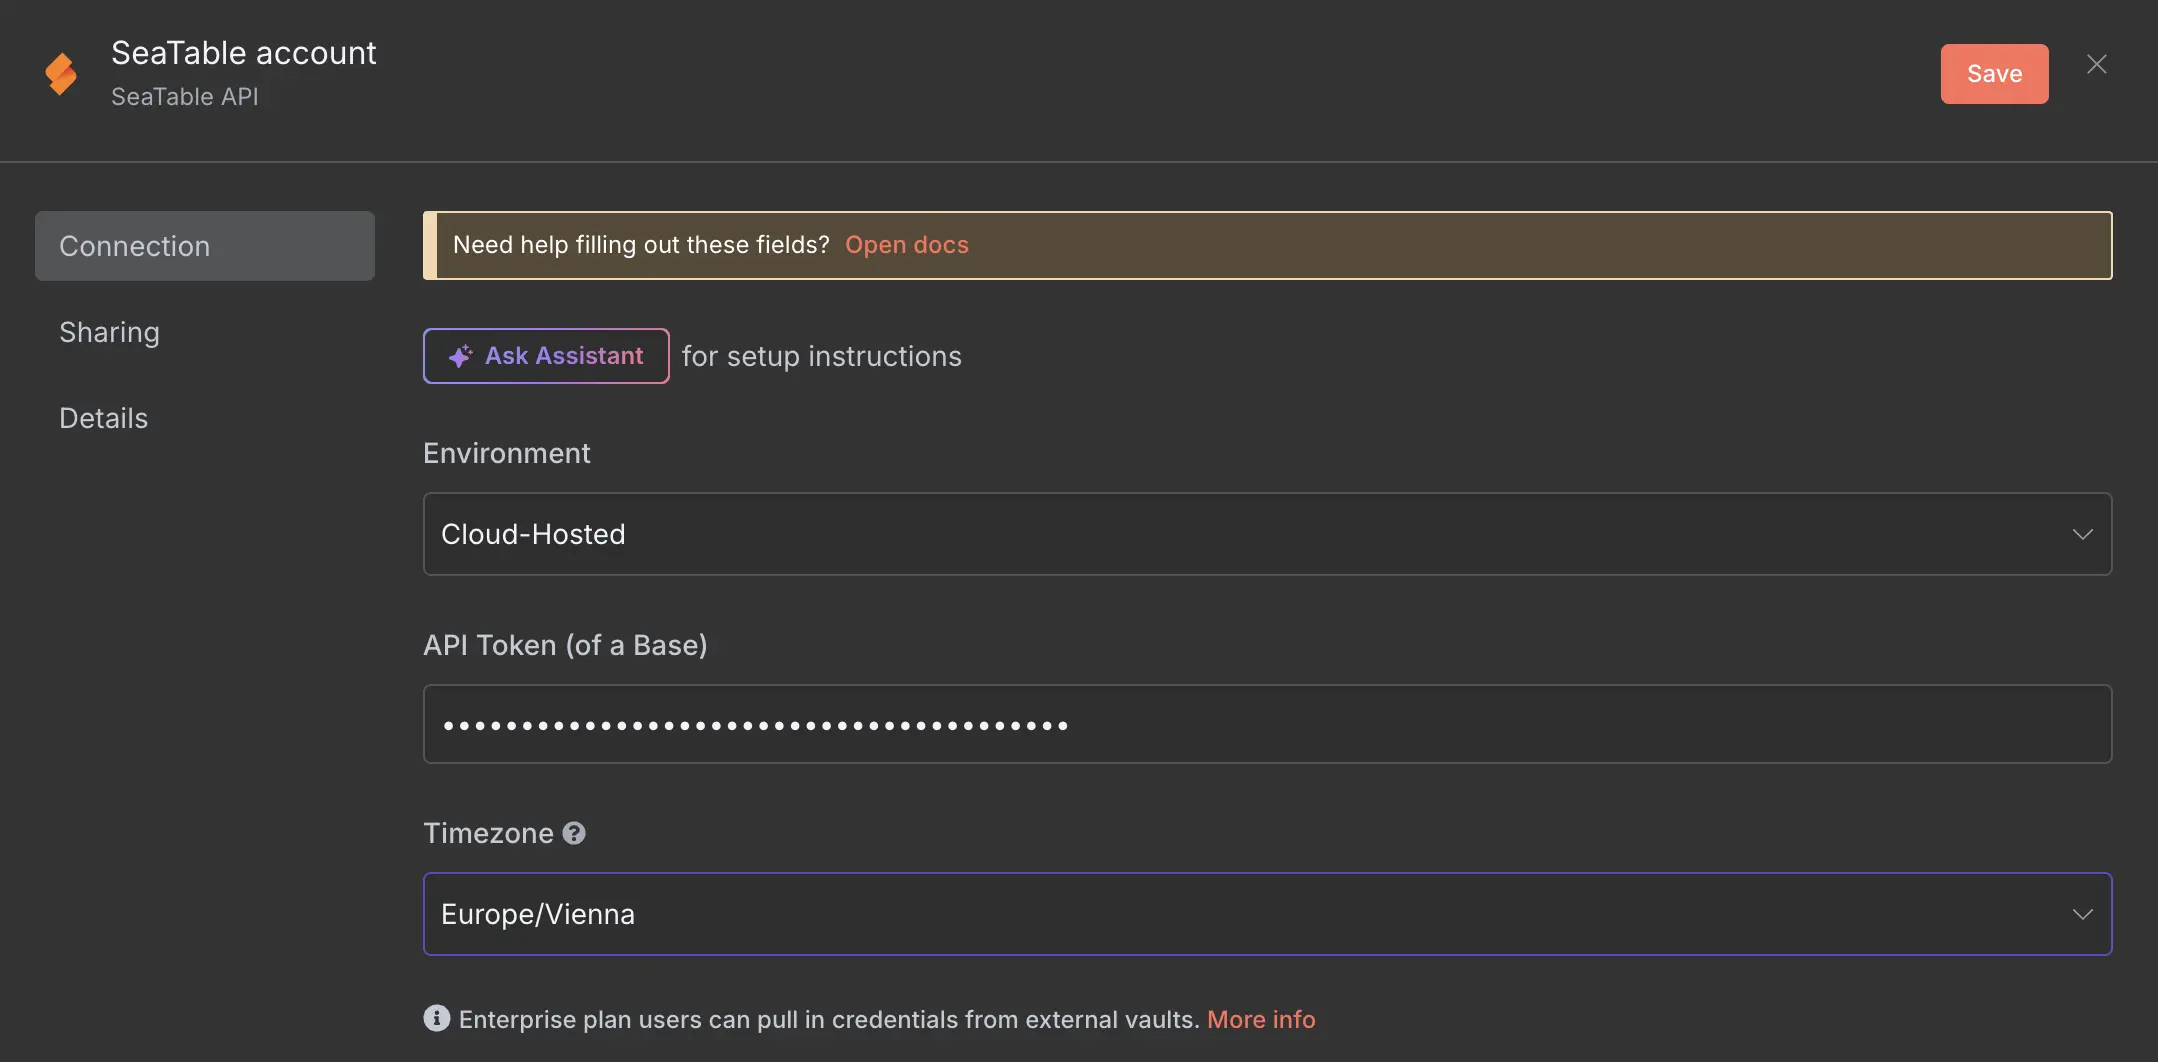
Which should confirm after saving that everything is working fine.
Searching for the Logo
Tell your SeaTable search node to look for a Key called logo in the Table PDF Configuration, if you execute it you will see something like this also containing an URL for the Logo. Great!
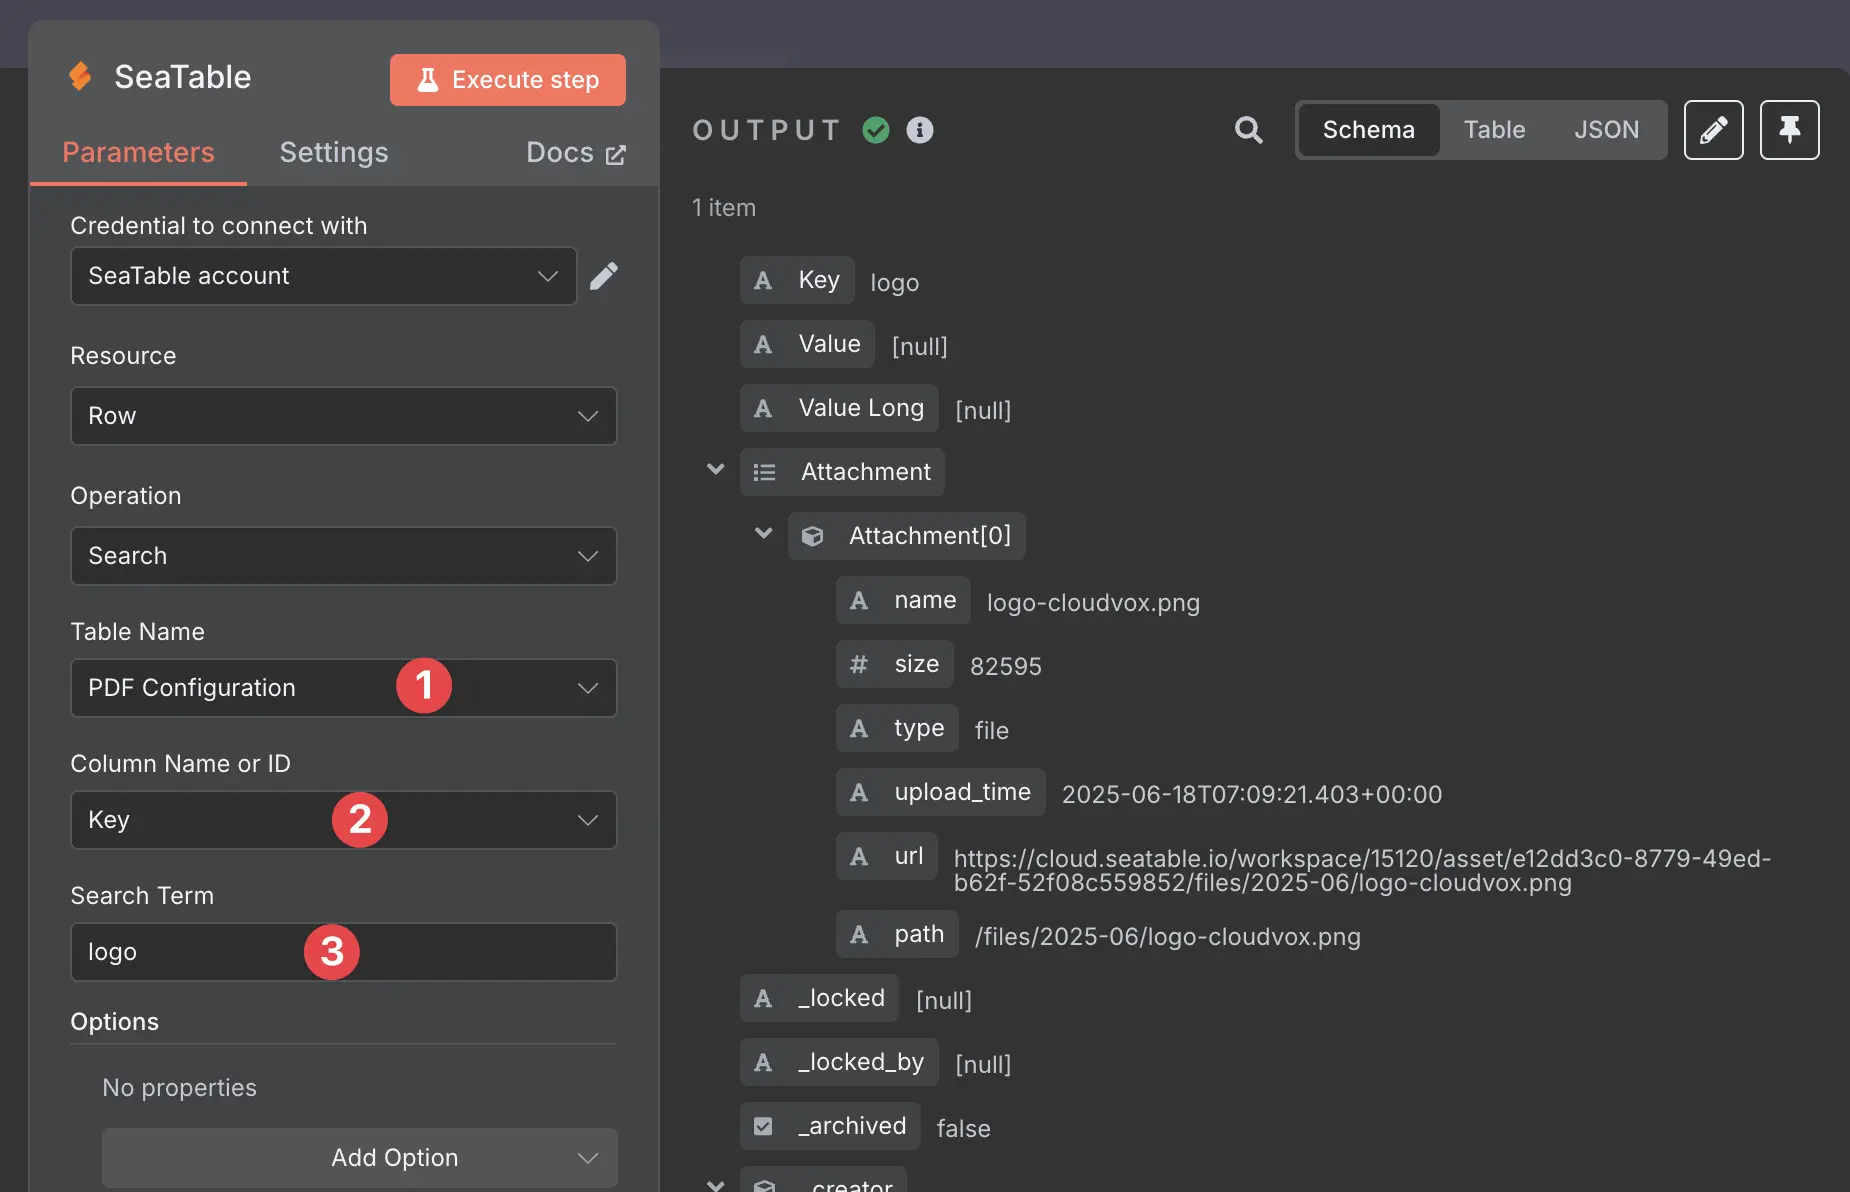
Well … almost, because that URL works if you are signed in to SeaTable but is not public accessible, which means Gotenberg also can’t access it.
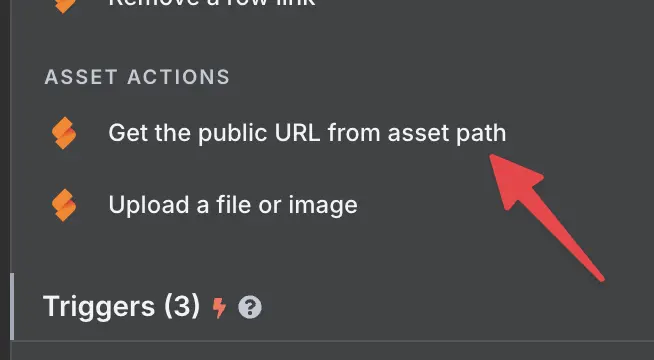
Creating a public URL for the logo
To be able to access the logo from Gotenberg, or any other public resource, you need to execute the Get the public URL from asset path SeaTable node.
Please note that once you created a public URL, it’s public. This means ANYONE knowing the URL can access it and there is no n8n node to remove a public link! So keep that in mind.
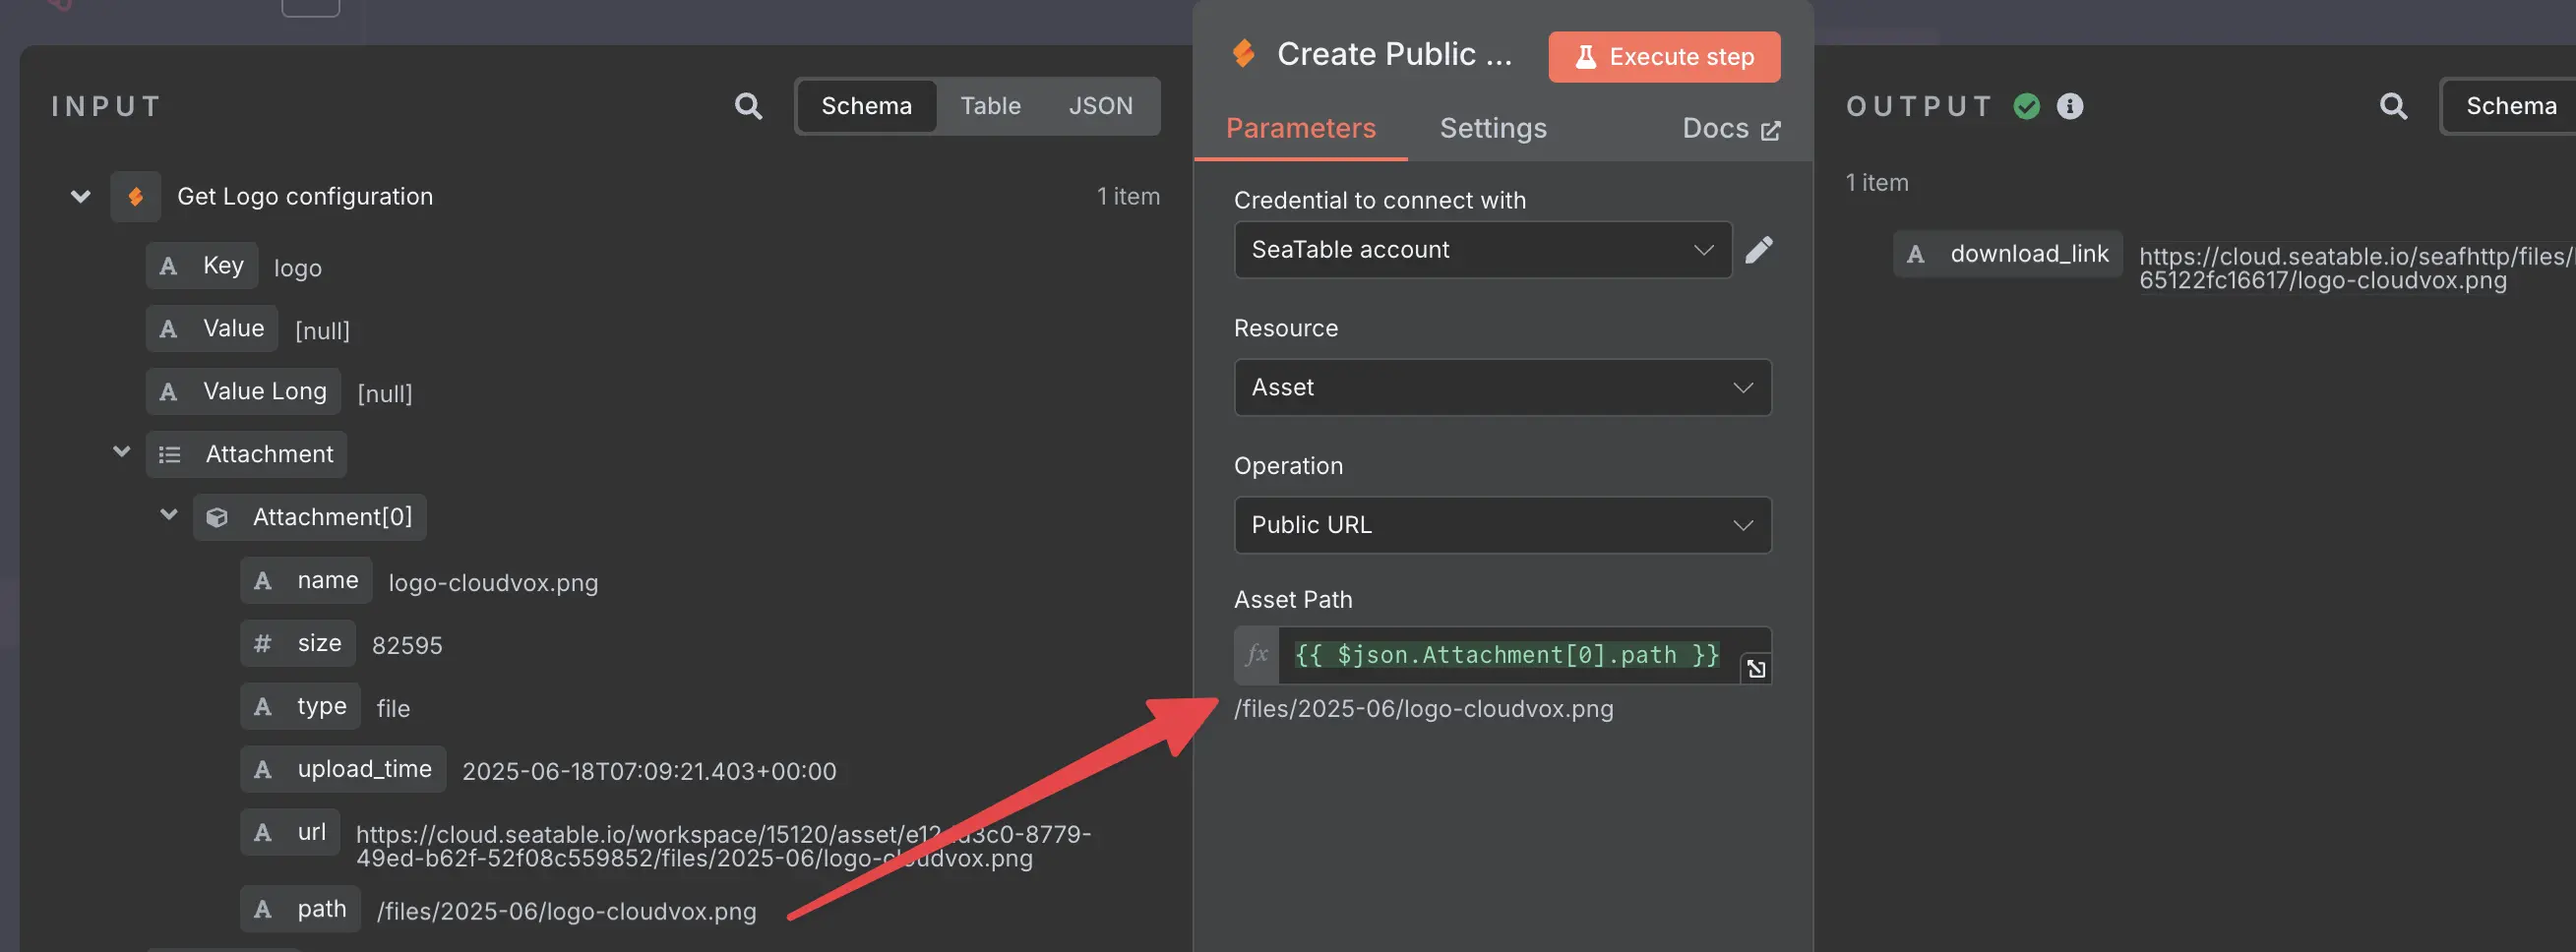
Call this node with the path from the search node; you need to use the path and not the URL!
Once executed you will get a download URL with which you, and Gotenberg for that matter, will be able to access the logo.
This can now be used in the html template to insert the logo. So let’s get to that now.
Adding the logo to the html
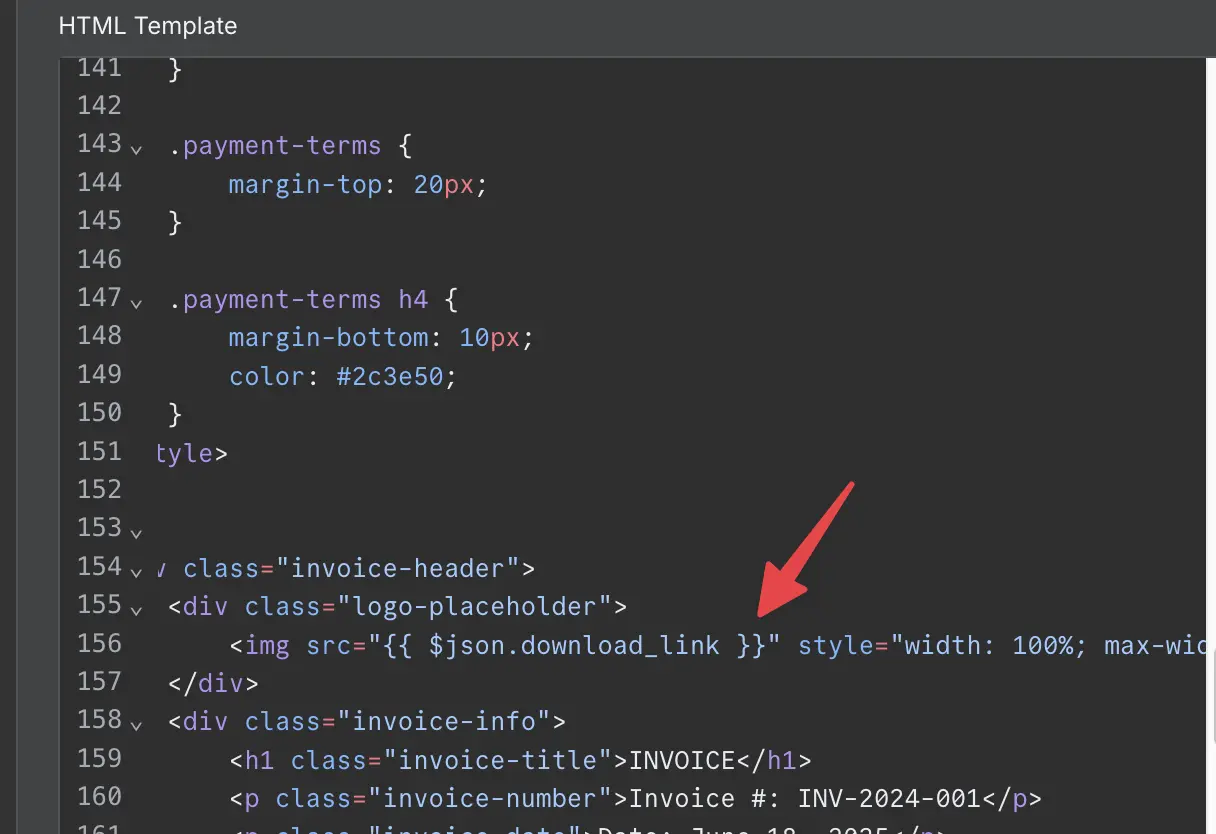
Get the new template from the html repo which basically just contains the line for the logo in addition to the previous template including some nasty inline styling to ensure the logo will not fill the full page.
<img src="{{ $json.download_link }}" style="width: 100%; max-width: 300px">
with that out of the way, let’s create the pdf and check the complete workflow.
Finally, a pdf with a logo
The PDF now contains the logo
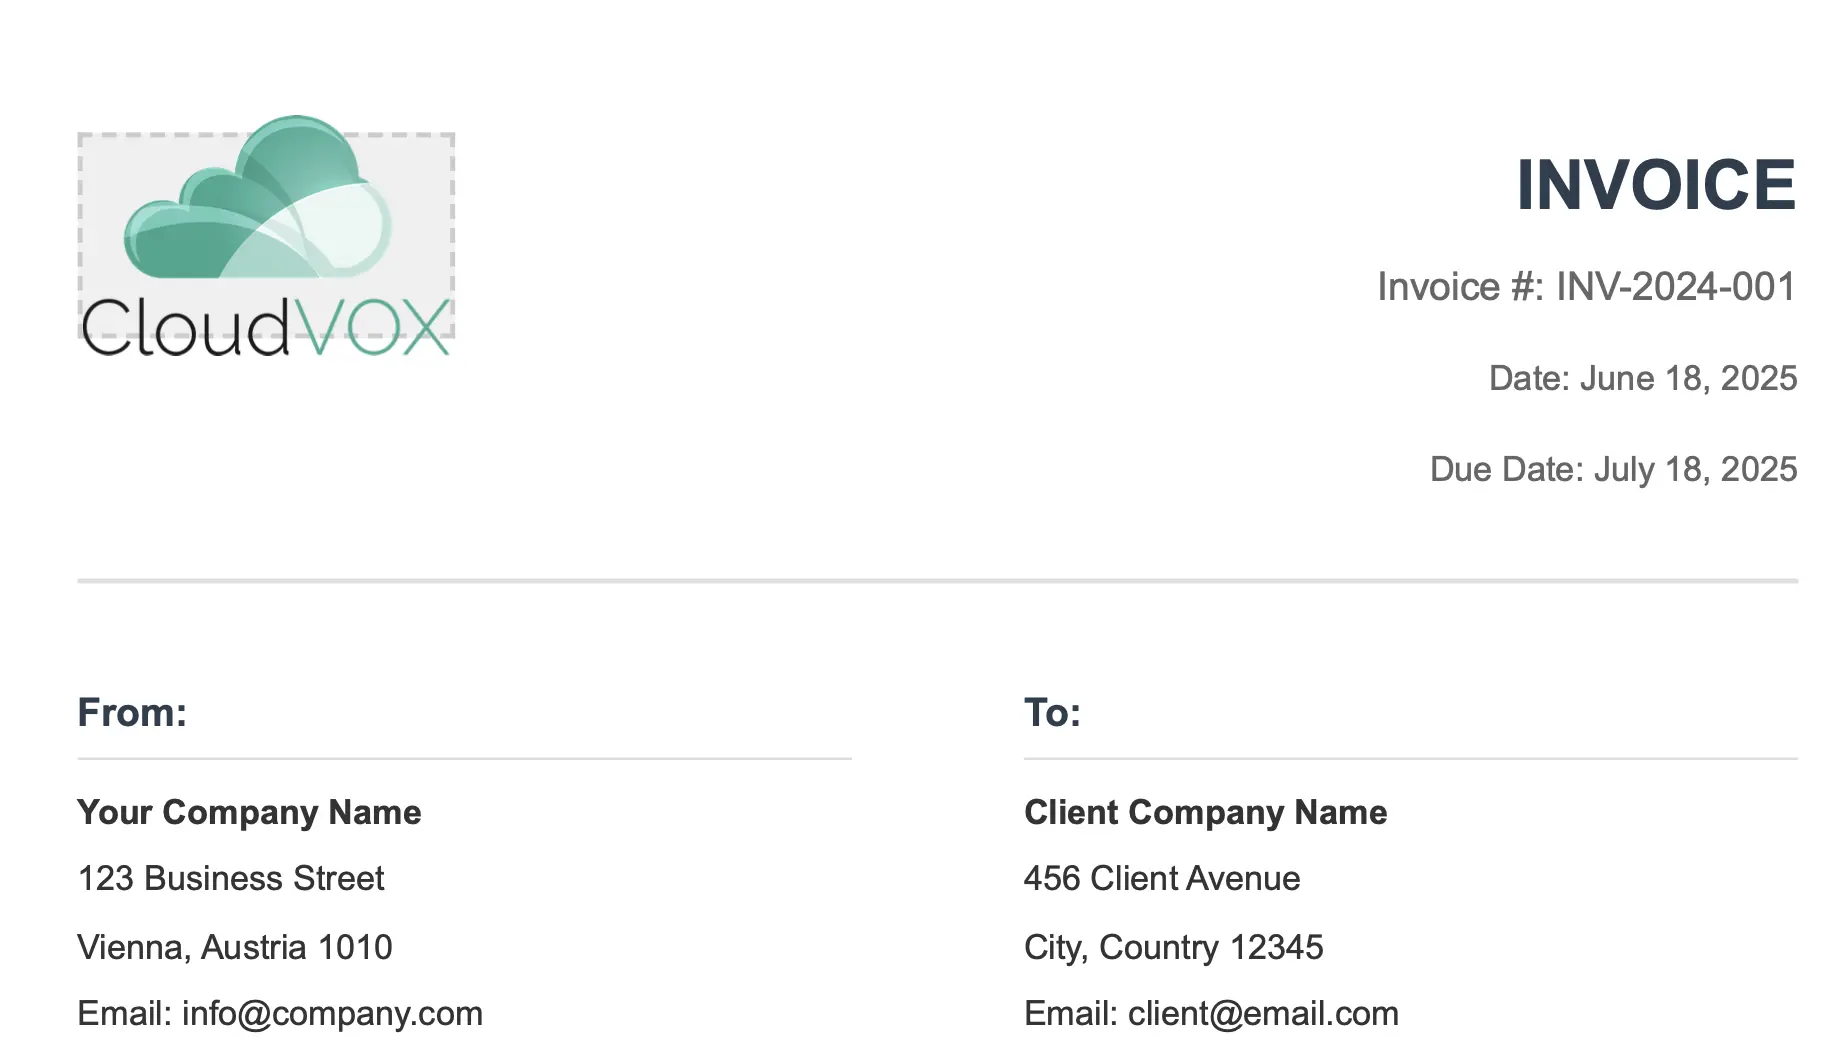
The border around it is unsightly, but this isn’t a tutorial on designing nice invoices, so it will suffice for this example.
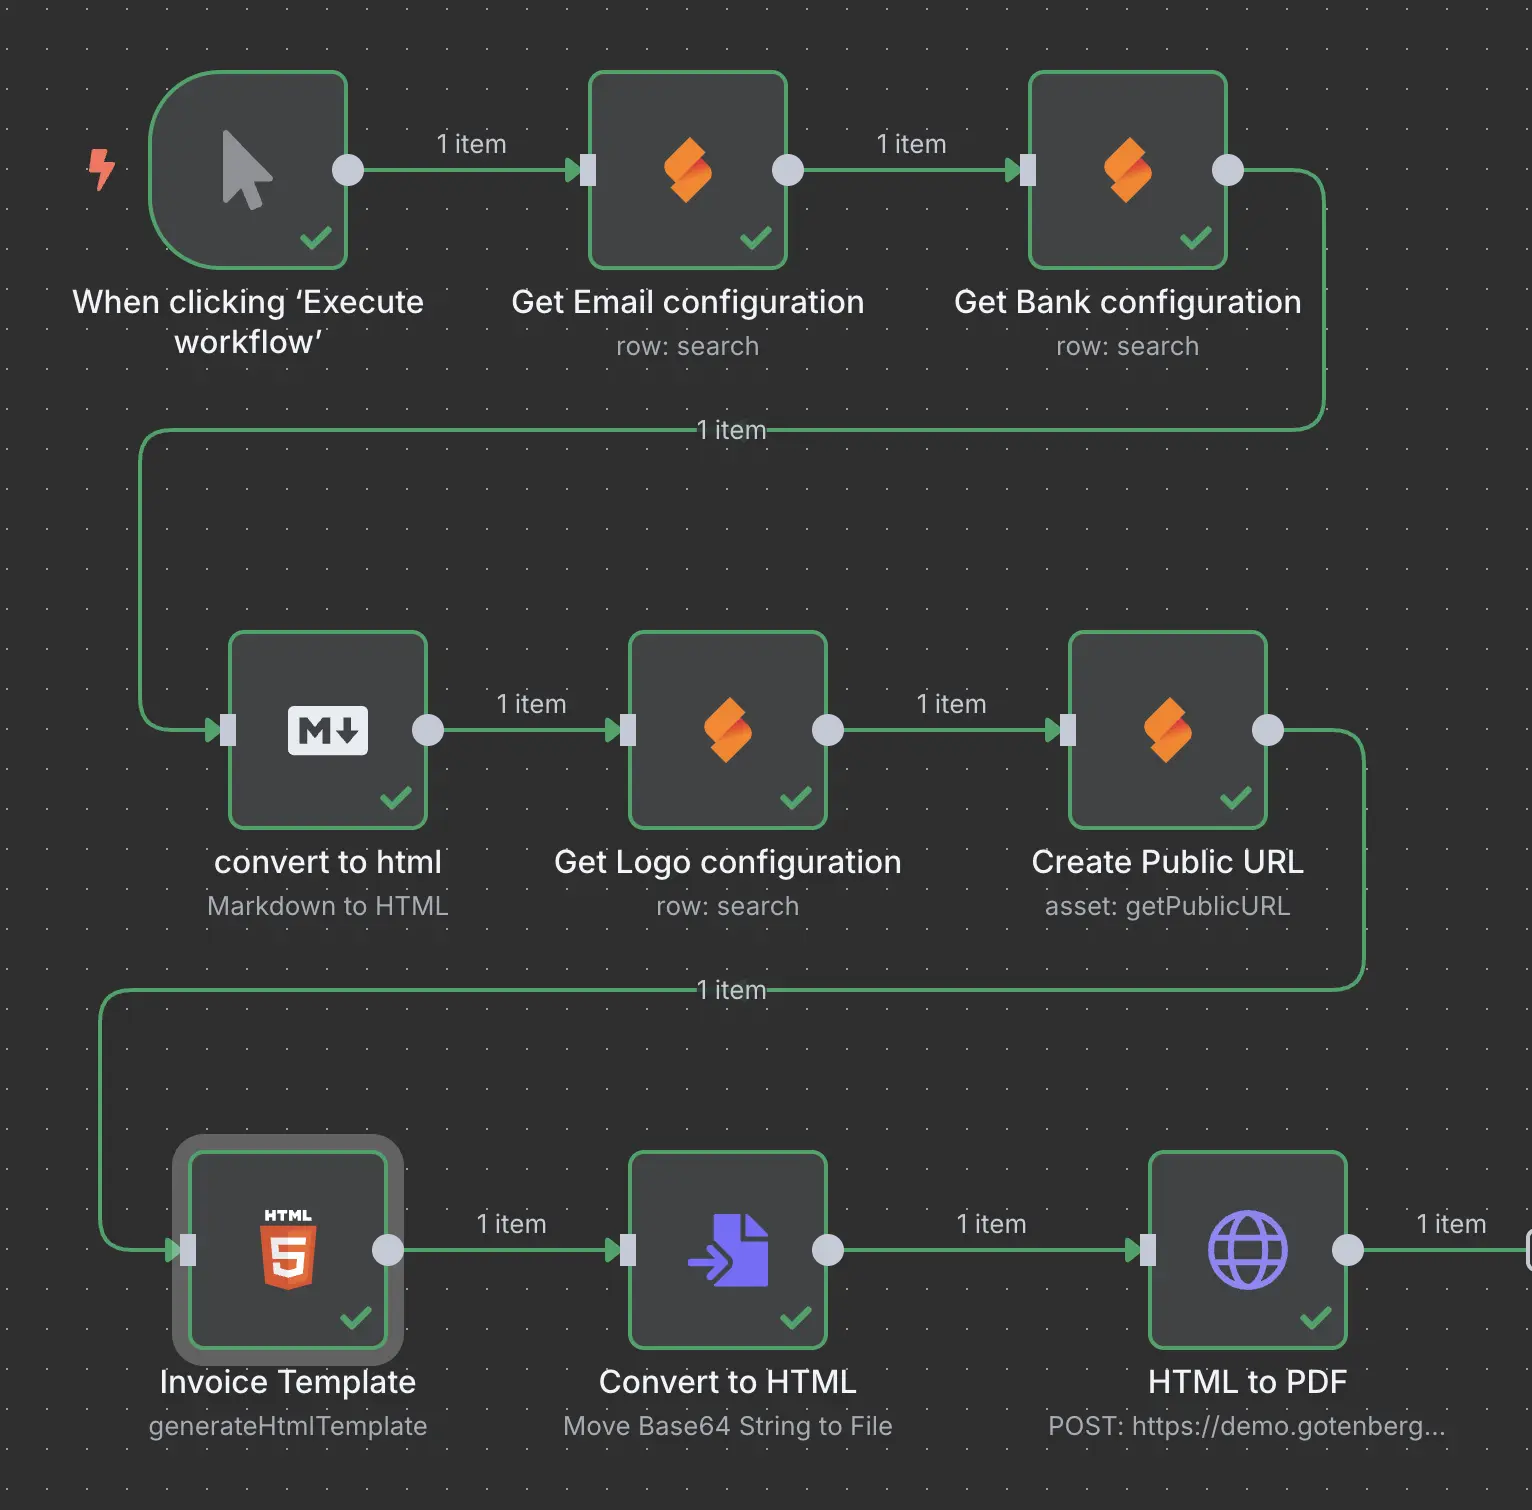
The full logo workflow
The “full workflow” sounds like it would be something really complex but looking at the workflow you can see how simple it is and why n8n is so great for this.

All that was changed in this workflow is the content of the Invoice Template and the two nodes to get the logo and public URL for the log.
How about adding some text?
Why not continue with this template? I will show you how to use the Value and Value Long fields as well.
For demonstration purposes, let’s just assume the Email from your company should be configurable.
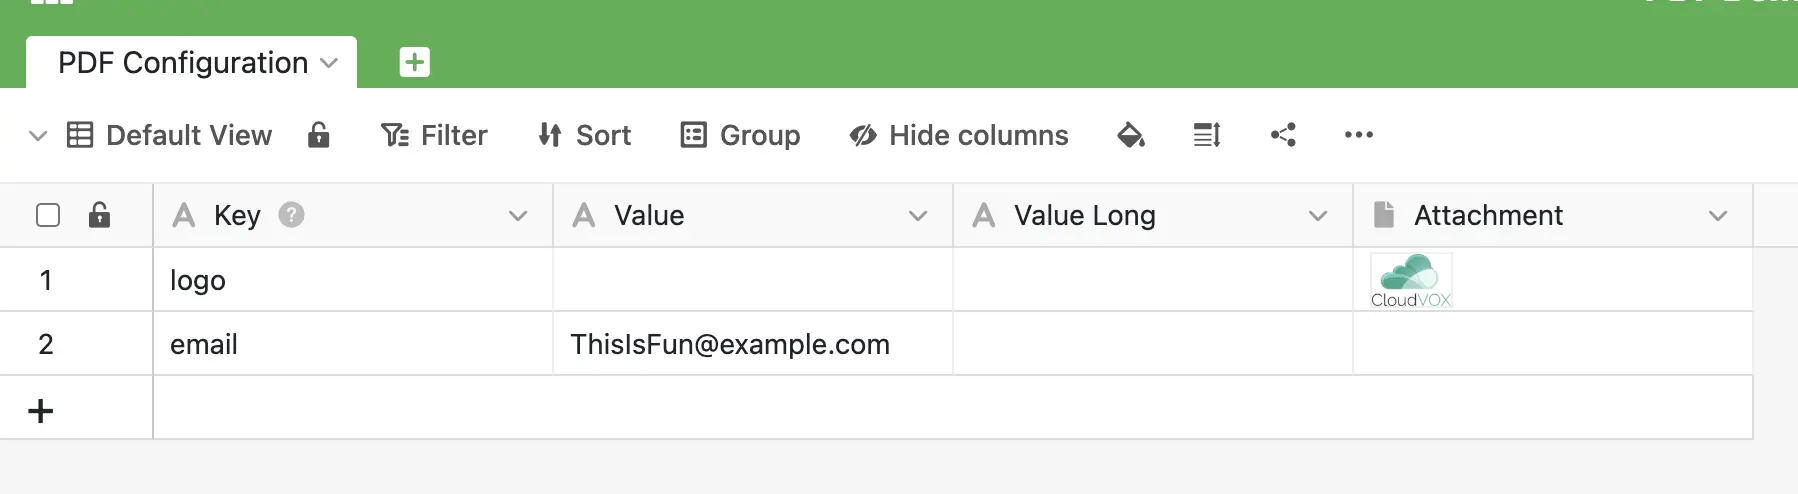
Adding new configuration in SeaTable
Go ahead to the PDF configuration in SeaTable and add a new row with the email.
Your configuration should now look like this:
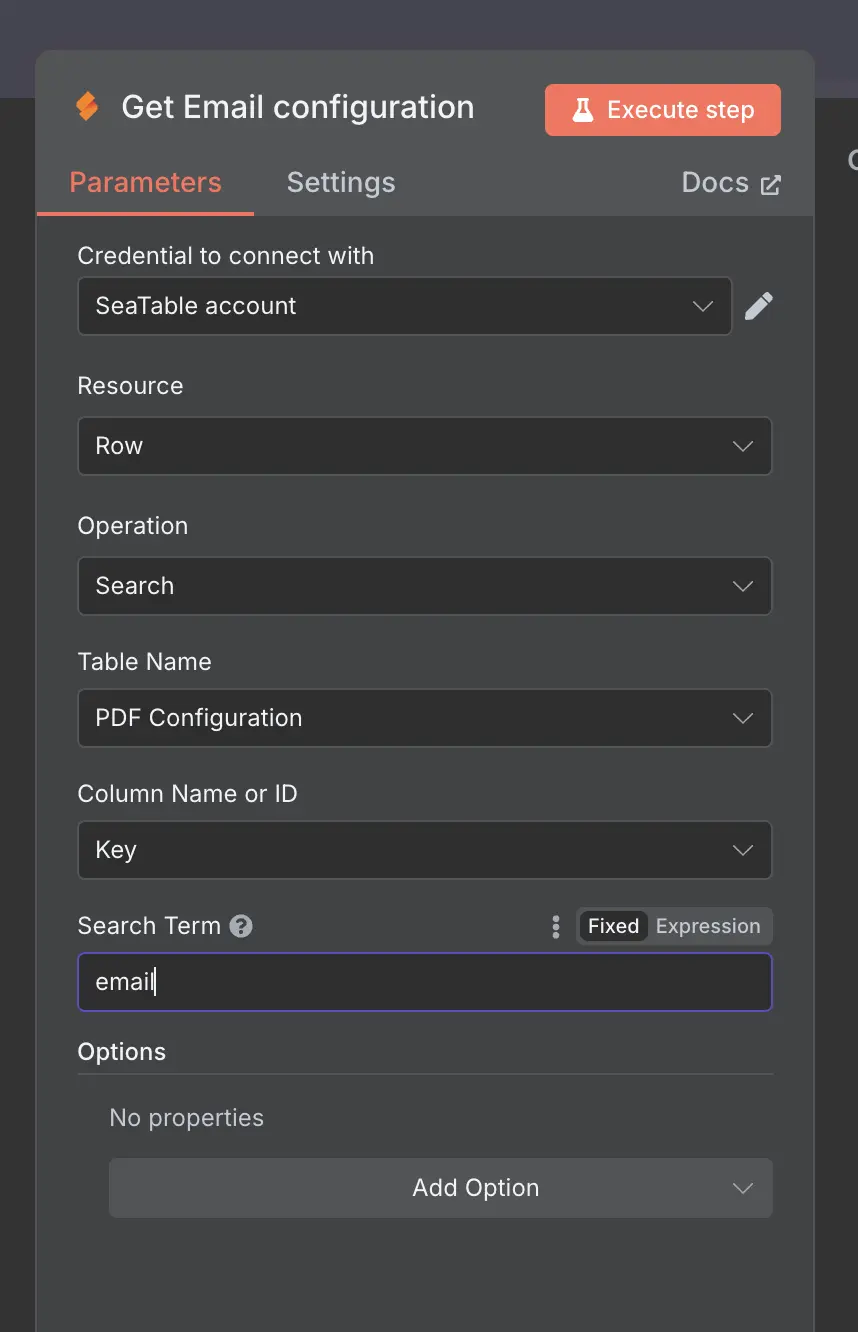
Fetching that configuration from n8n
All you need for this is a new search node and searching for the email Key.
Update your template to contain the email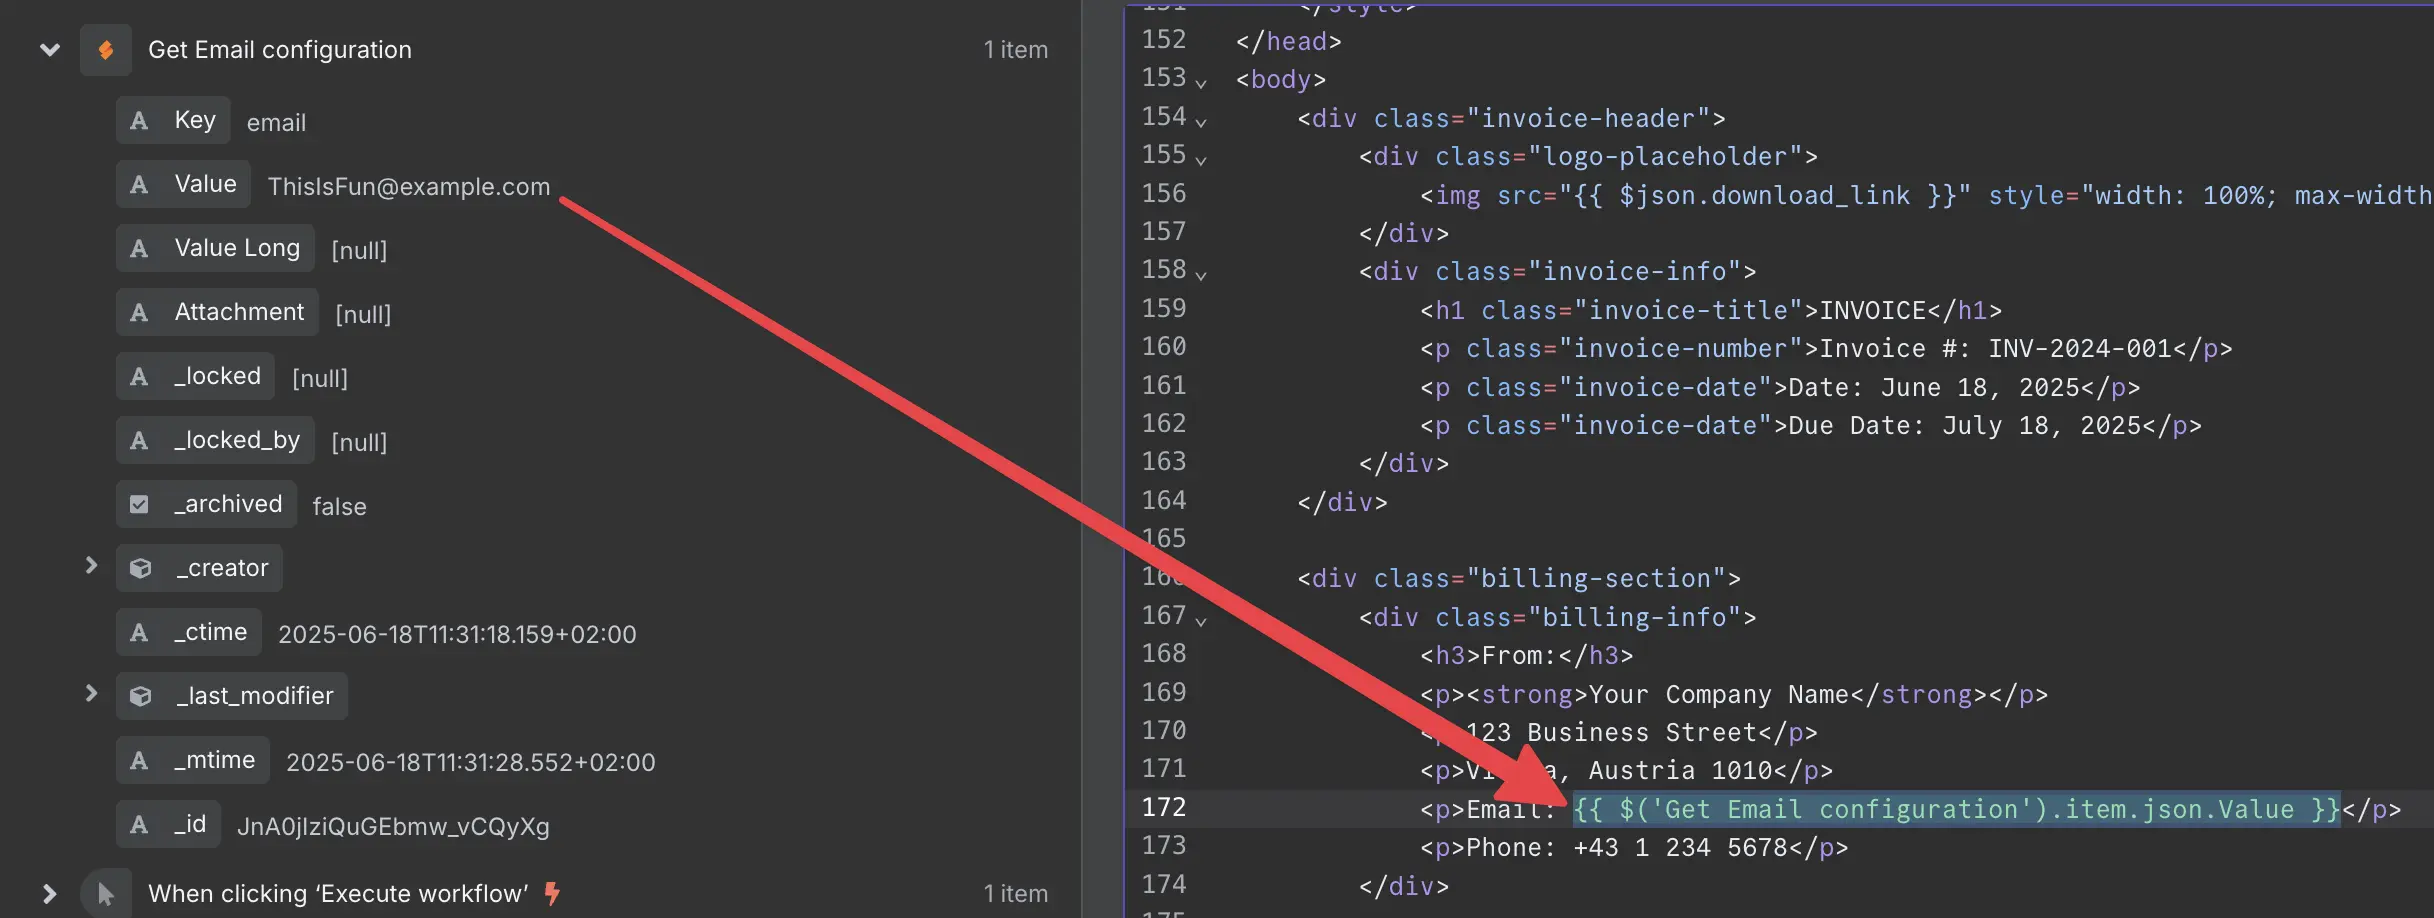
and you’re done 🎉. You have successfully added the Email from the SeaTable configuration into the PDF.

You can get the new invoice html invoice from the repo As well as the new workflow which now looks like this:
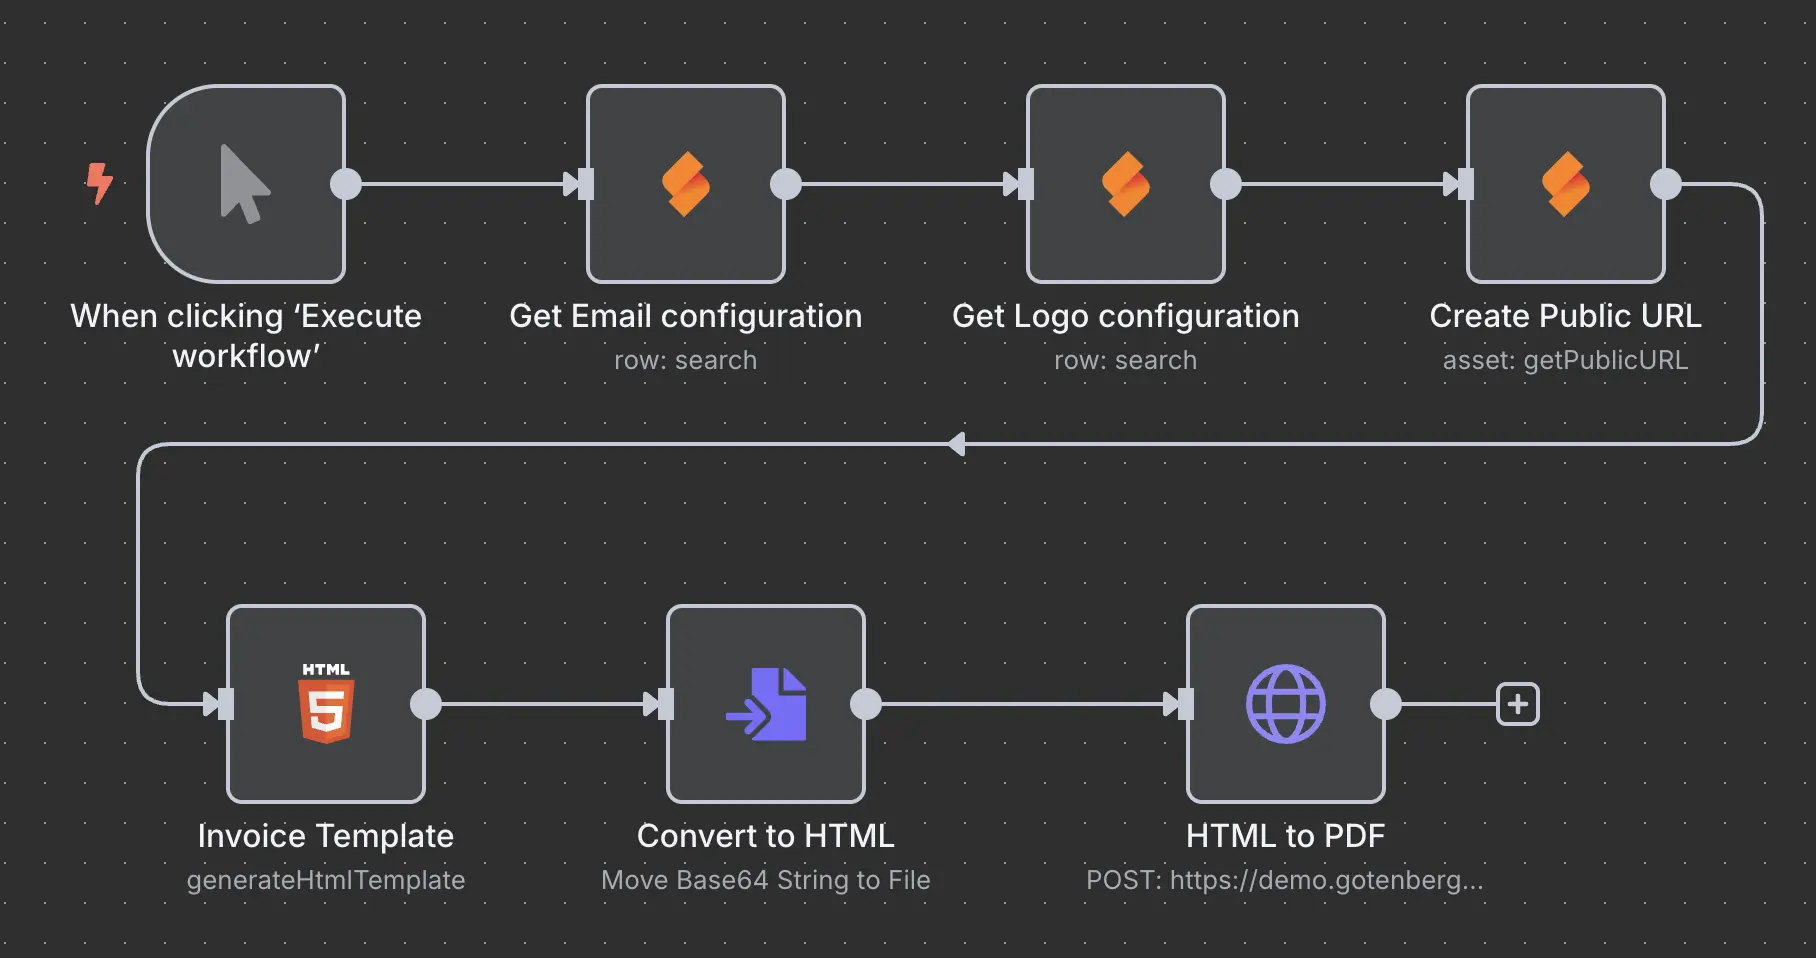
Nice. Still simple and easy, and it’s already configurable and extendable.
What about the Value Long values?
Adding formatted text
Now to the last part of this tutorial: adding formatted text to the template. For this example, let’s tackle the bank details and make them configurable in SeaTable:
Adding bank configuration to SeaTable
First, let’s fix an error in the SeaTable table. The Value Long field was accidentally created as a Text field instead of Long Text
Go to the Column configuration → Customize column type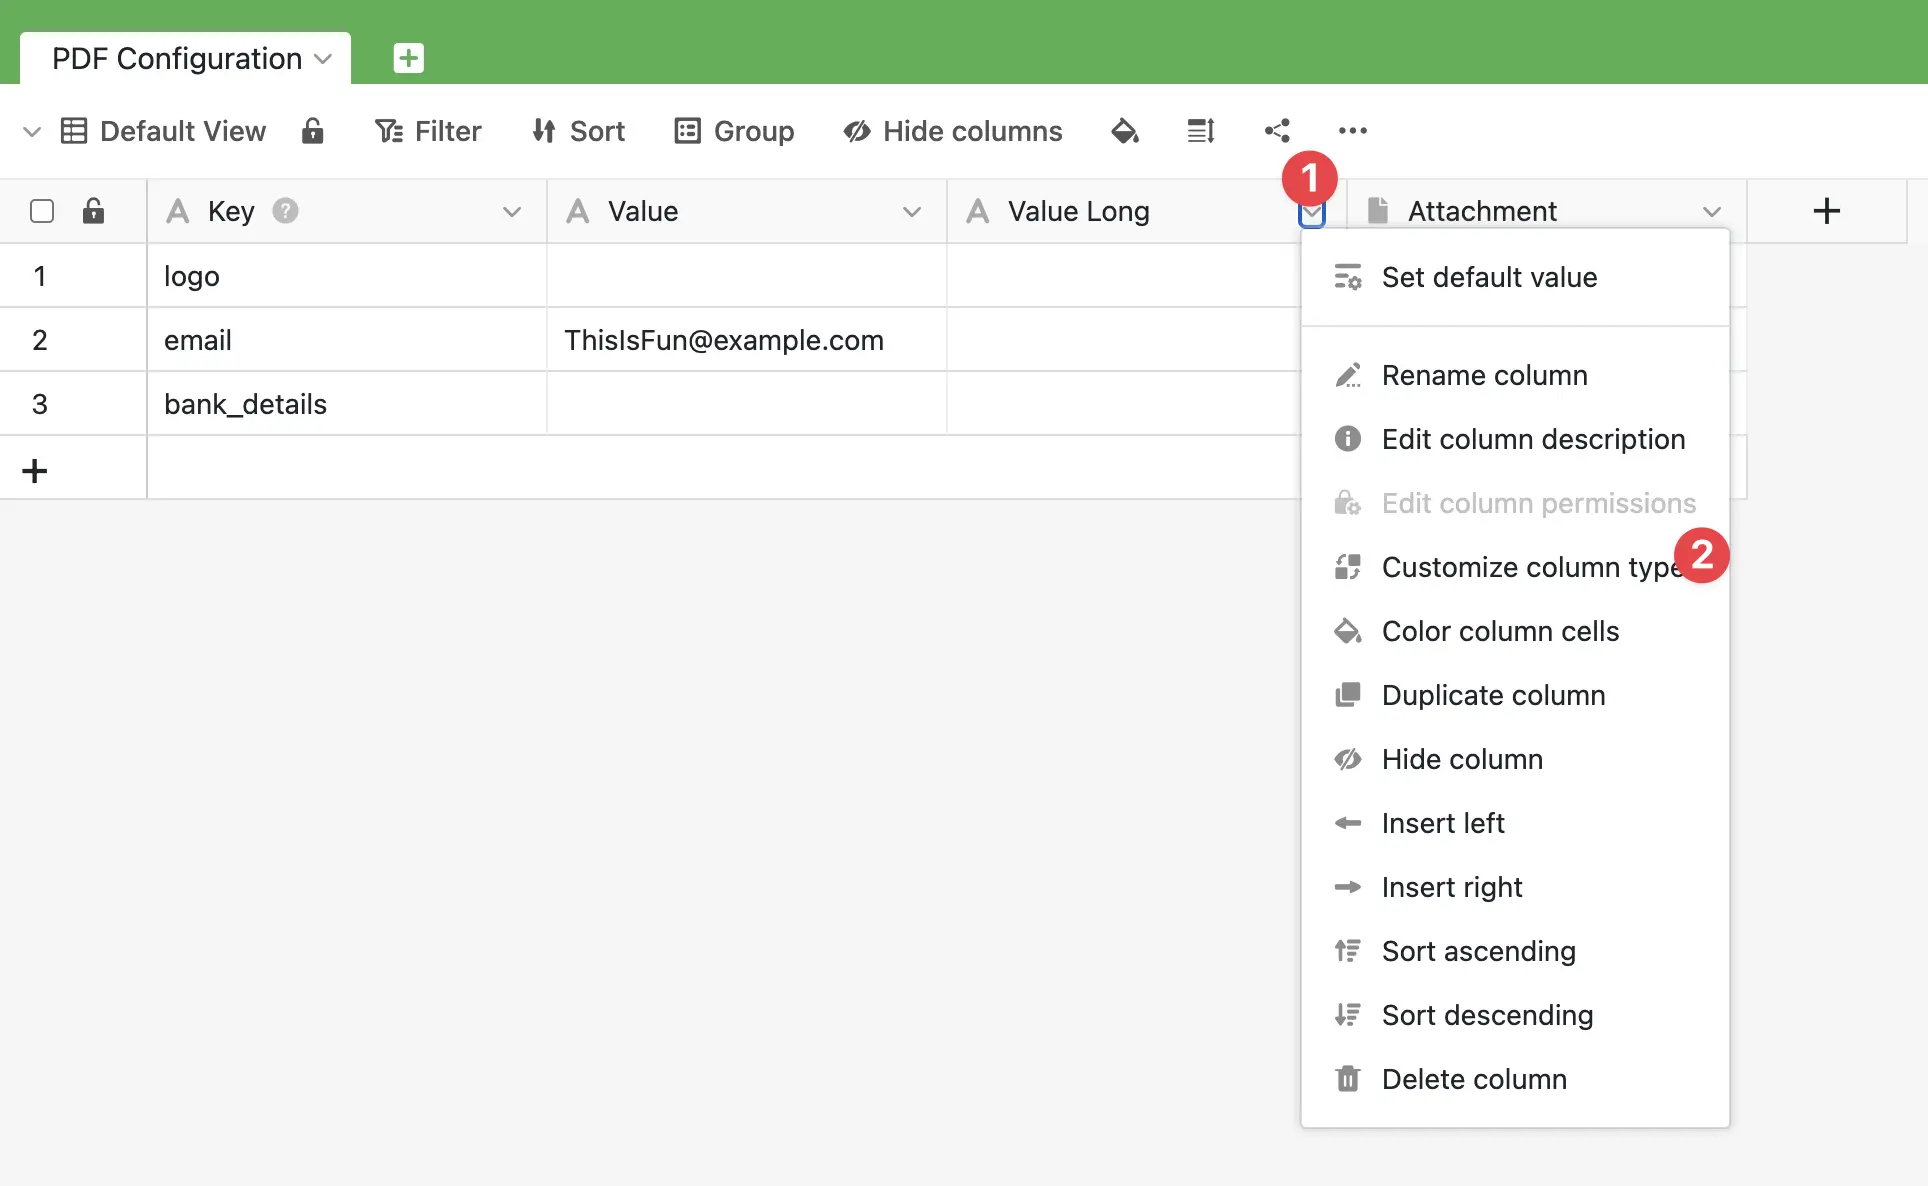
And change it to Long Text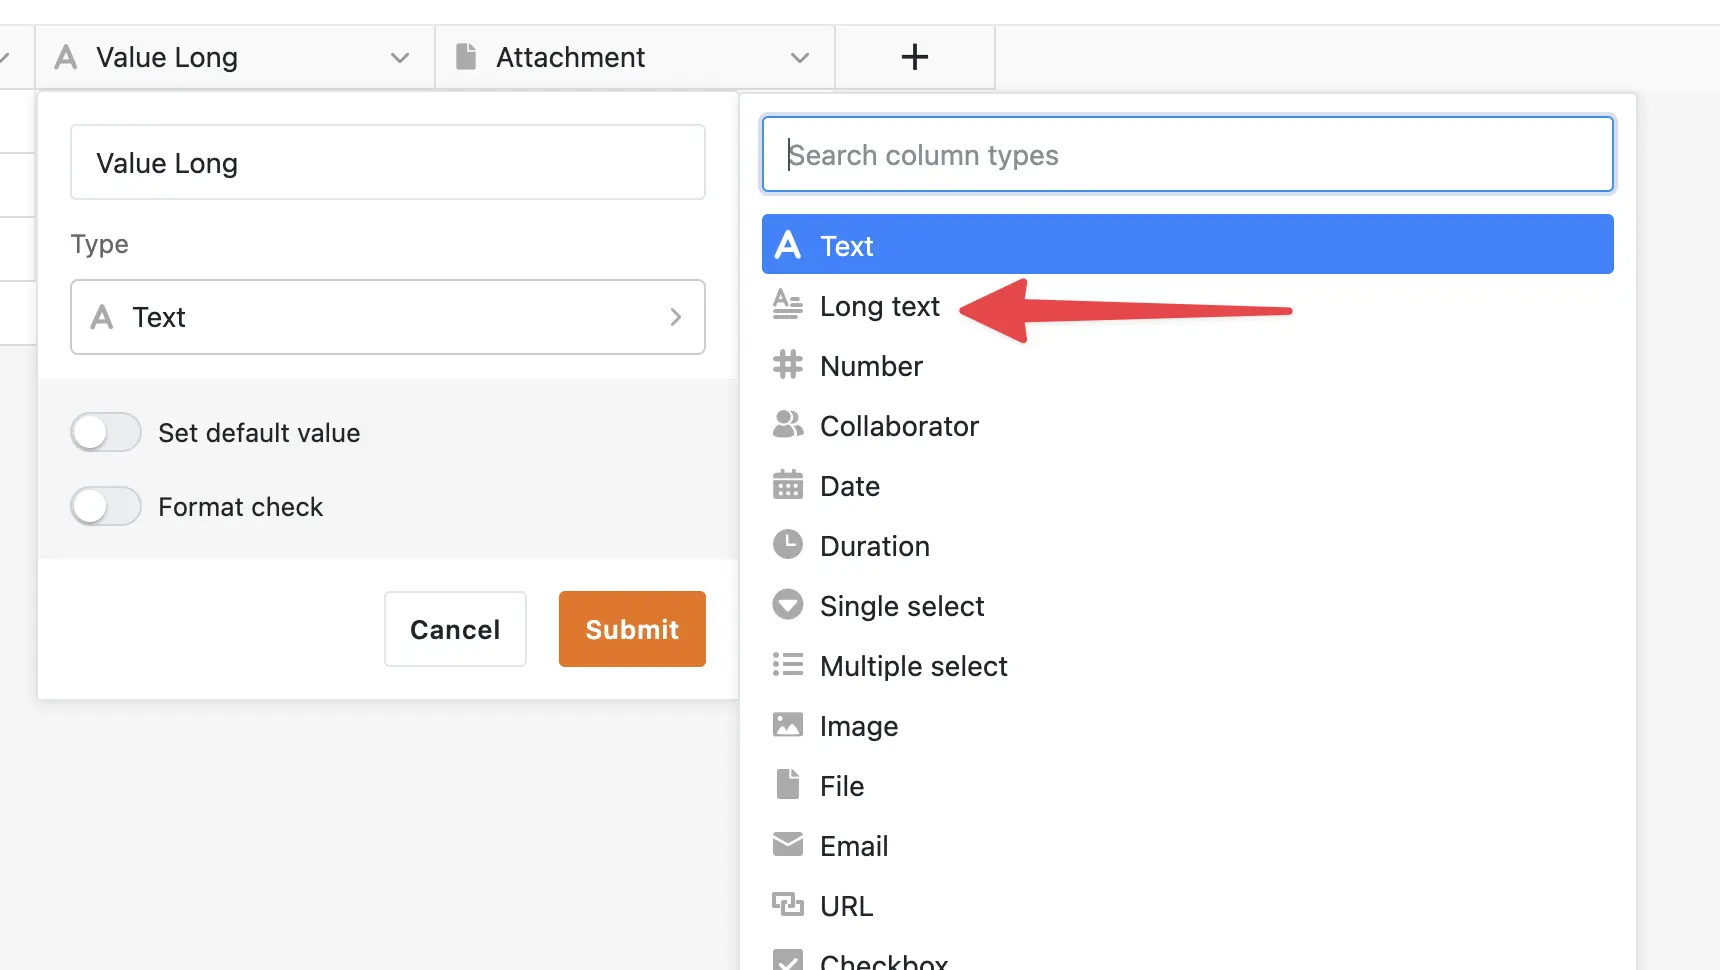
Now you can add the formatted text to SeaTable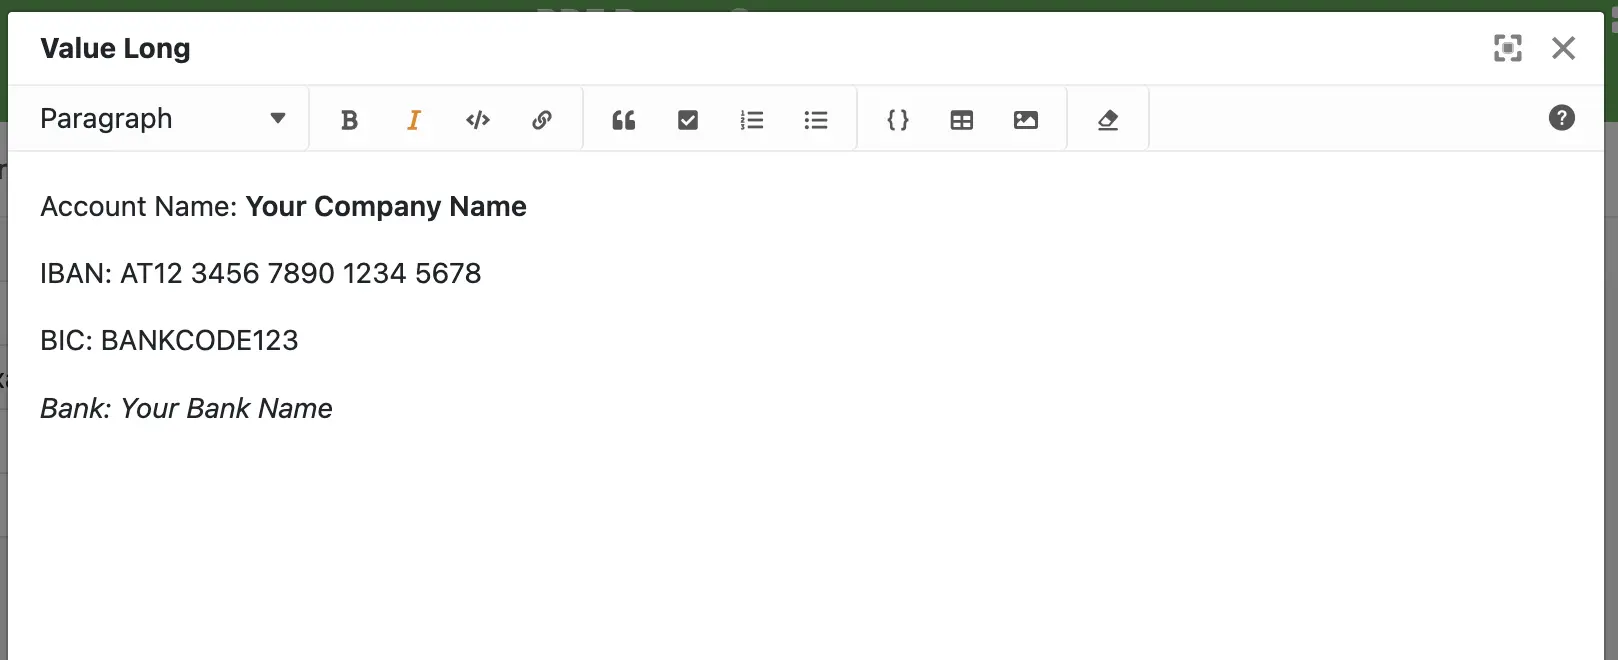
Why anyone would write the Bank name in italic is beyond me, but hey, I’m not judging.
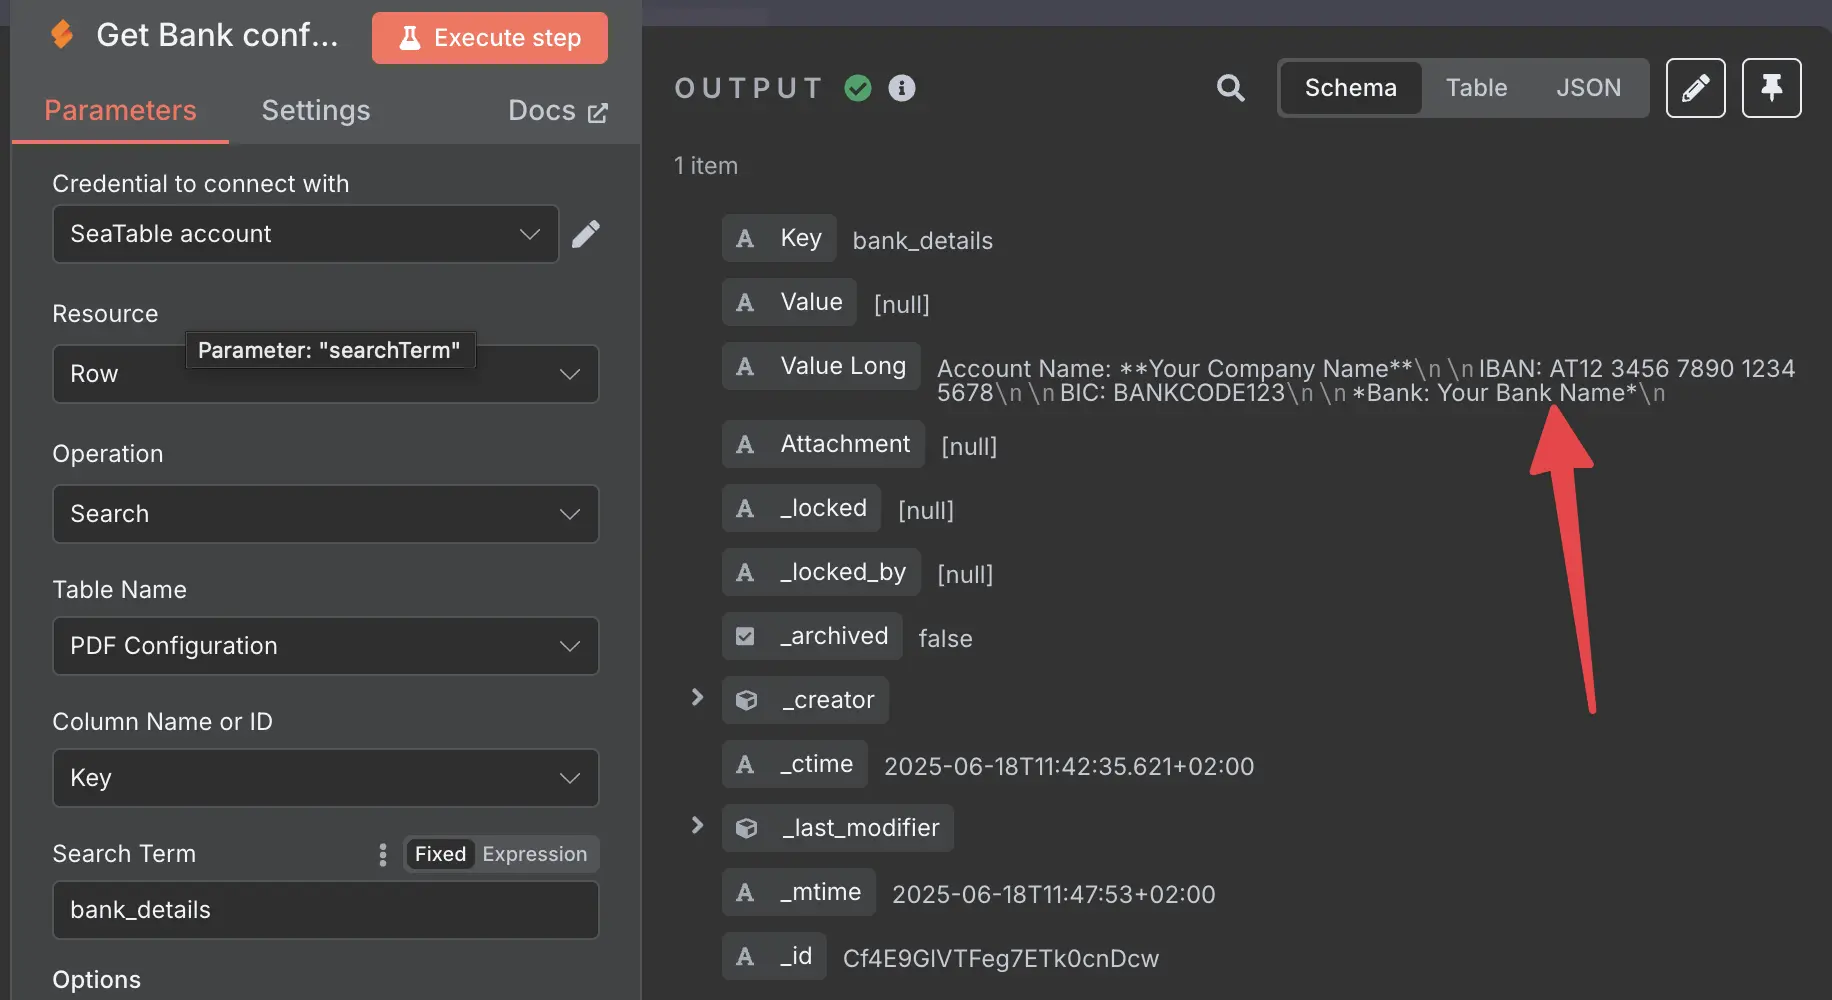
Fetching the new configuration
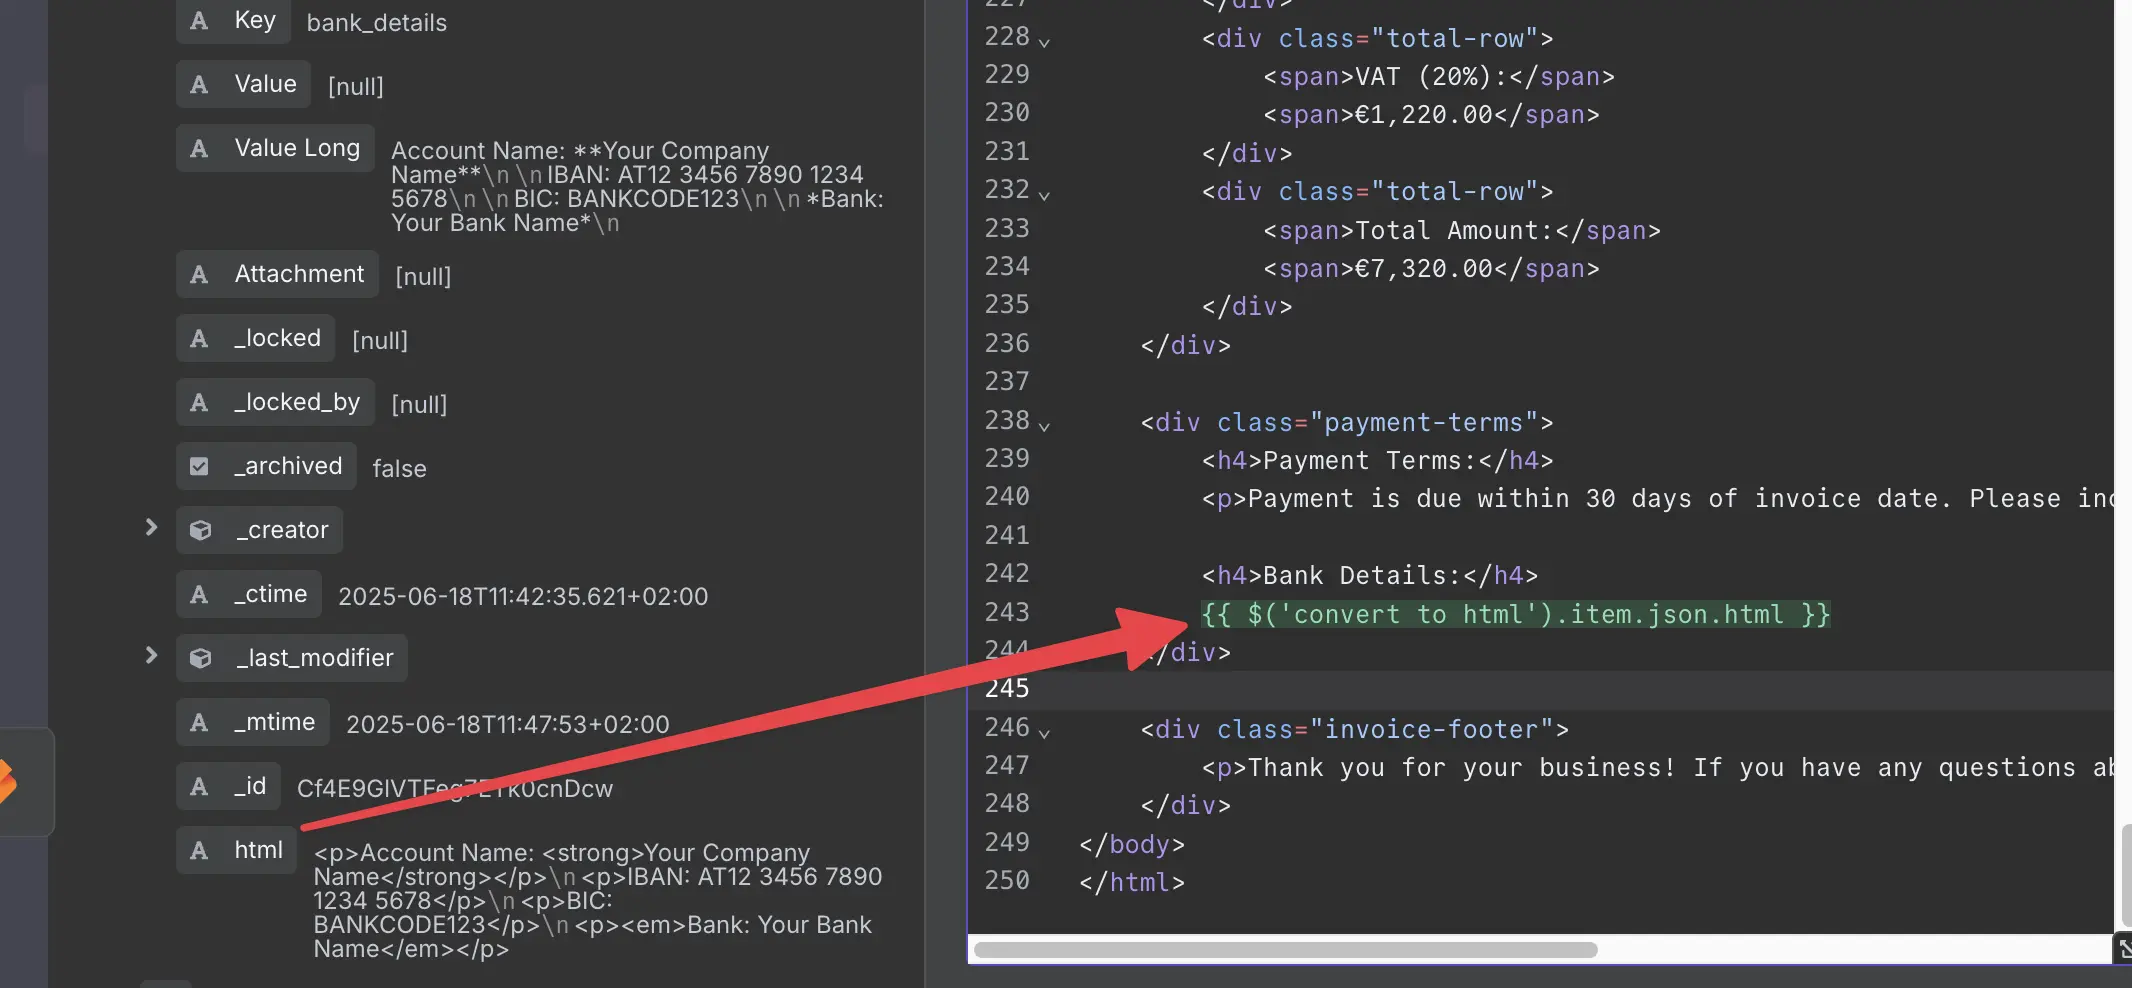
Now again, add a search node and look for the Key bank_details which will give you the formatted data for the PDF, however, this formatting is in markdown and we need html.
Converting markdown to html
Lucky you, n8n comes with a markdown-to-HTML node
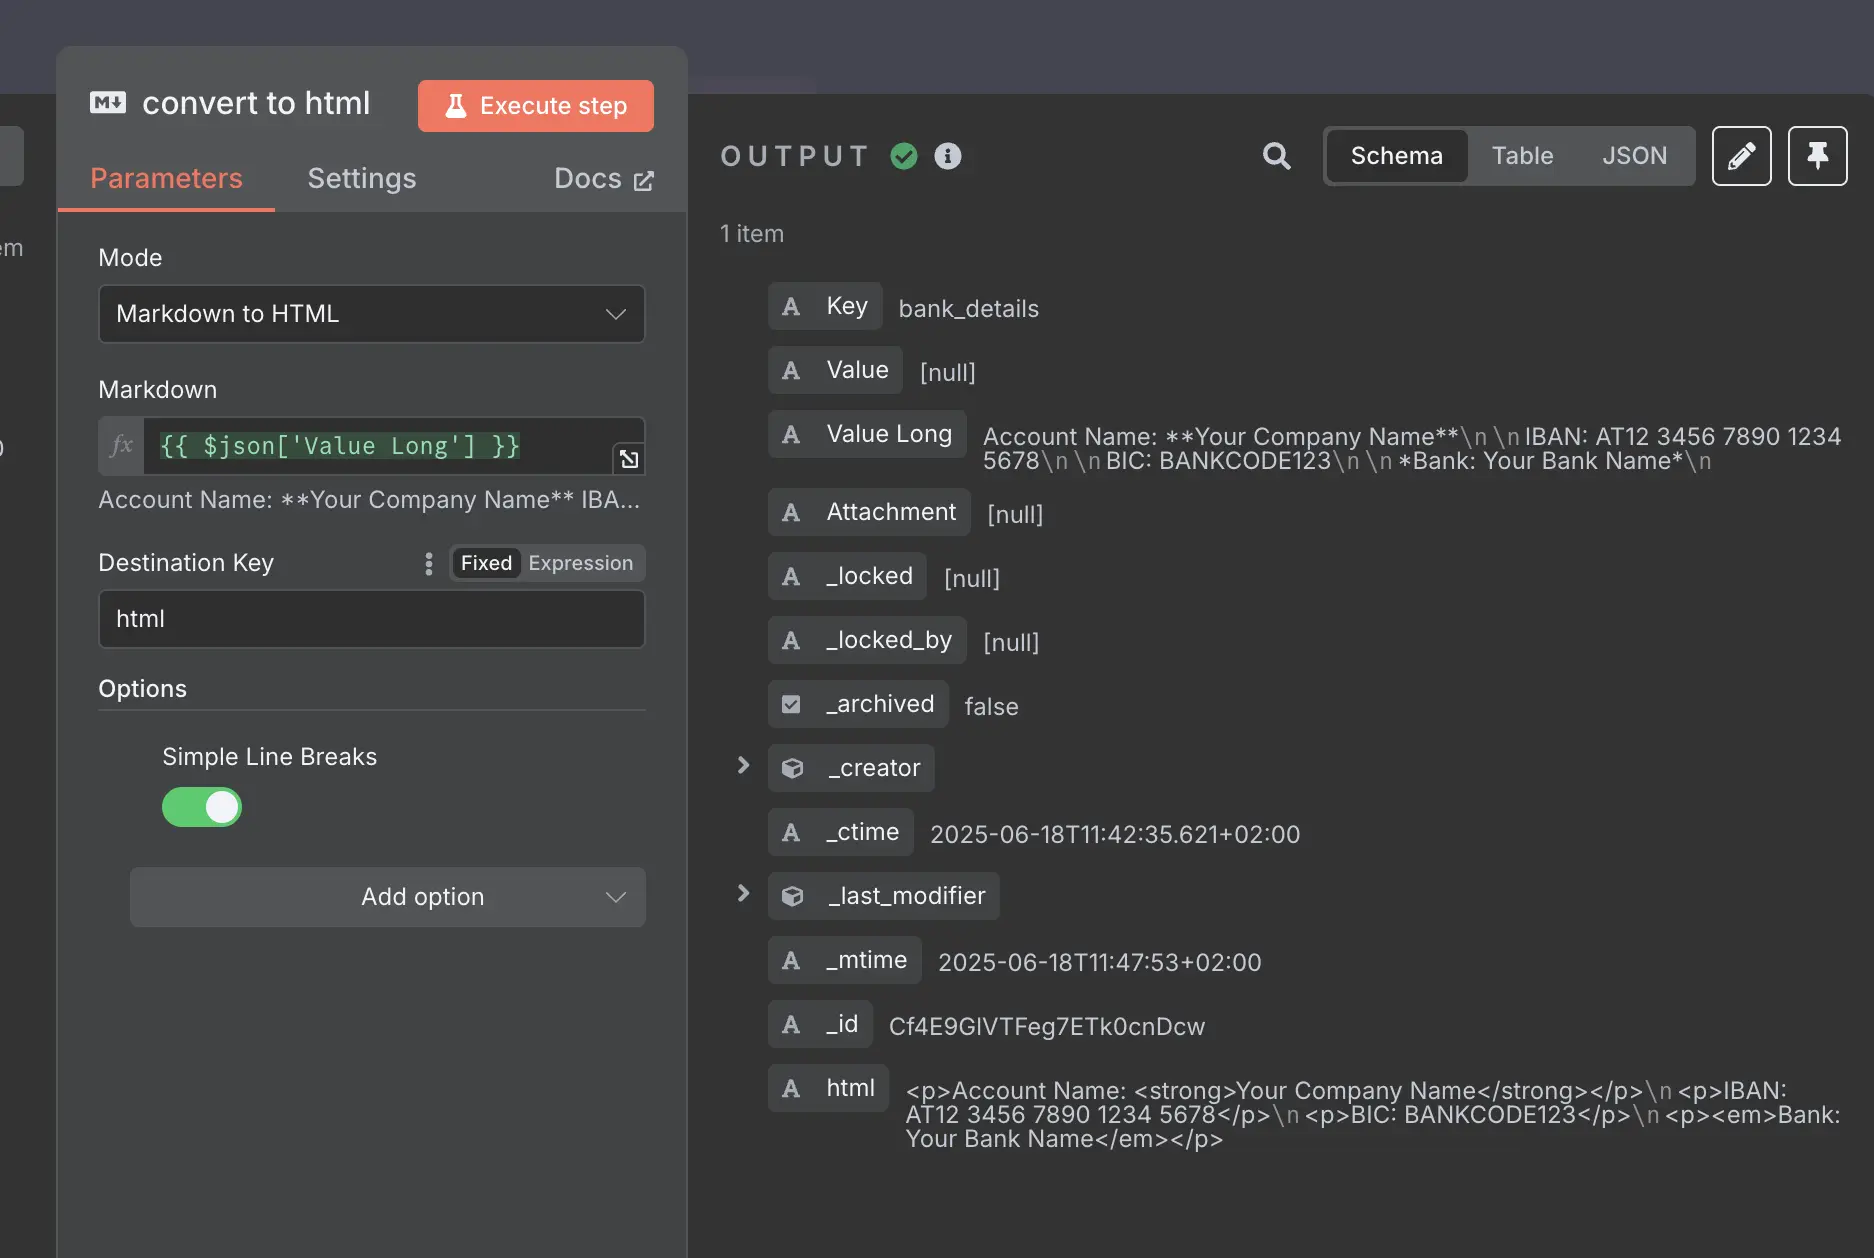
There is still one thing I don’t quite like, something I’ve had issues with in the past. I do not like the double line breaks that come from SeaTable and also had issues with non visible spaces or escaped @ characters. This is easy to solve with just a little javascript.
So instead of {{ $json['Value Long'] }}, you will use {{ $json['Value Long'].replaceAll(/ /g, ' ').replaceAll(/\n\n/g, '\n').replaceAll(/\\@/g, '@') }} which will take care of replacing these occurrences.
Adding it to the html template
All you need to do now is add this formatted text to the html template. Remove the static text from the html template and insert the data from the markdown conversion node. (or just download the new html from the repo)
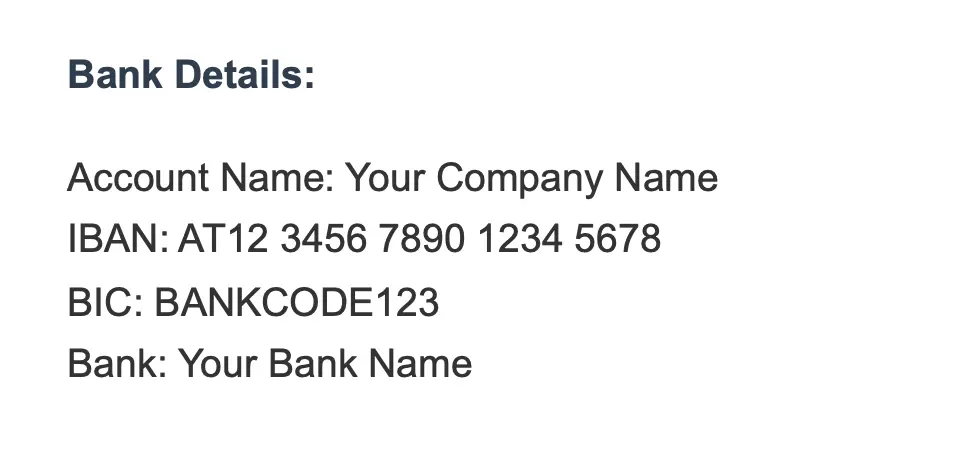
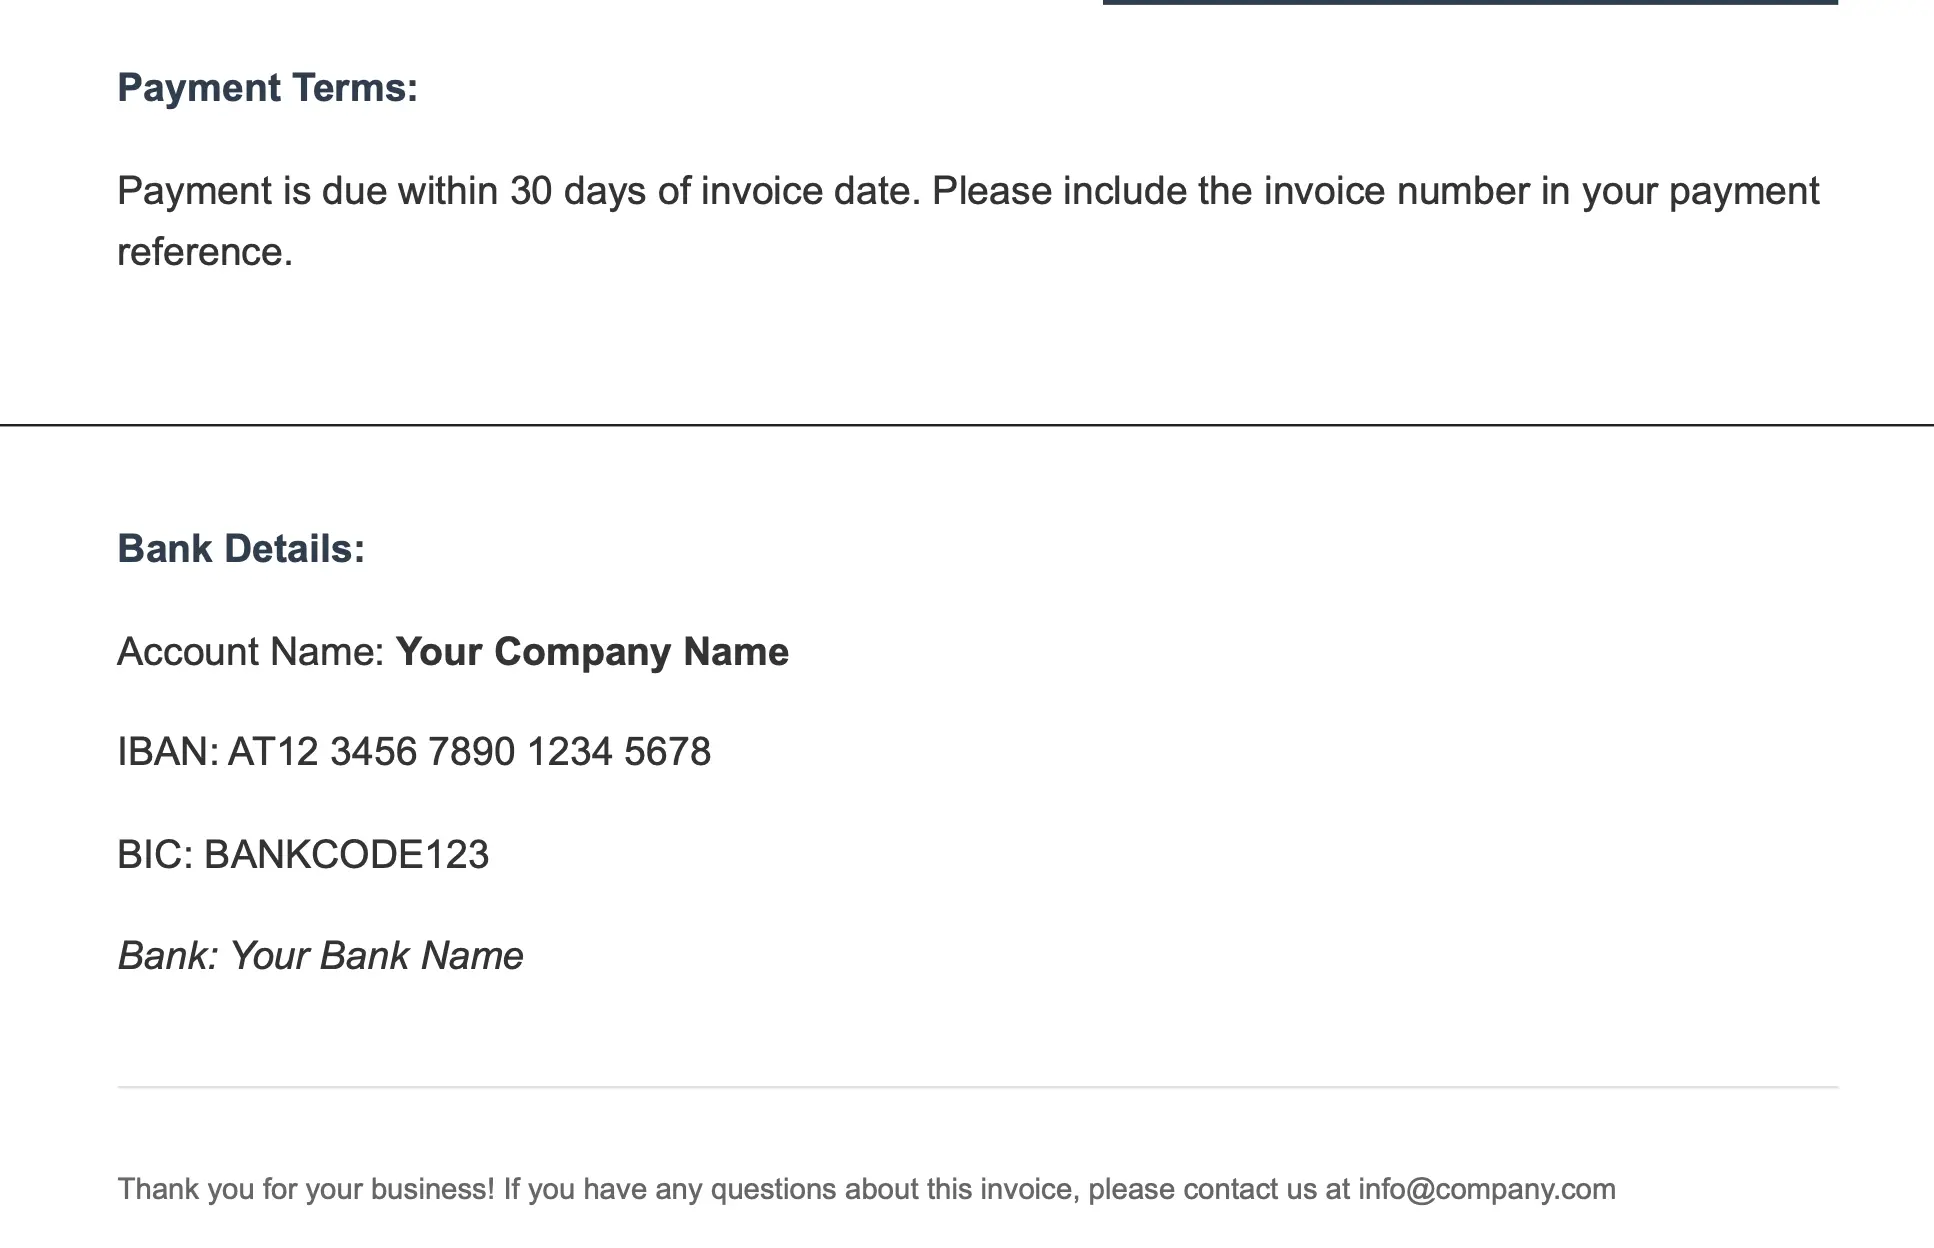
And look at this, the formatted data is on the PDF.
Final thoughts
Now, before you go ahead and implement this in production, let me address a few things. This workflow is intentionally simple to demonstrate the core functionality of connecting SeaTable with n8n and Gotenberg. In a real-world scenario, you’d probably want to make some improvements. For starters, if you have many configuration items, adding a separate search node for each one can make your workflow look like a tangled mess. You could optimize this by fetching all configuration data in a single call and then processing it, or by creating a more sophisticated lookup system. But for the sake of this tutorial, multiple search nodes make it easier to understand what’s happening at each step. Also, this example has absolutely no error handling. What happens if the logo key doesn’t exist in SeaTable? What if the API is down? What if the image file is corrupted? In a production workflow, you’d want to add proper error handling, fallback values, and maybe some validation to ensure your PDFs don’t break when something goes wrong. The goal here wasn’t to create a bulletproof production system, but to show you how these three tools work together and give you a foundation to build upon. Once you understand the basics, you can add all the bells and whistles your specific use case requires. So take this as a starting point, not the finish line. Happy automating! 🚀
Need help with n8n?
If you’re looking to level up your automation game or need help implementing workflows like these in your business:
- n8n Training - Learn to build powerful automation workflows yourself
- Consulting Services - Let us help you automate your business processes
Get in touch if you want to turn those repetitive tasks into automated workflows that run 24/7!
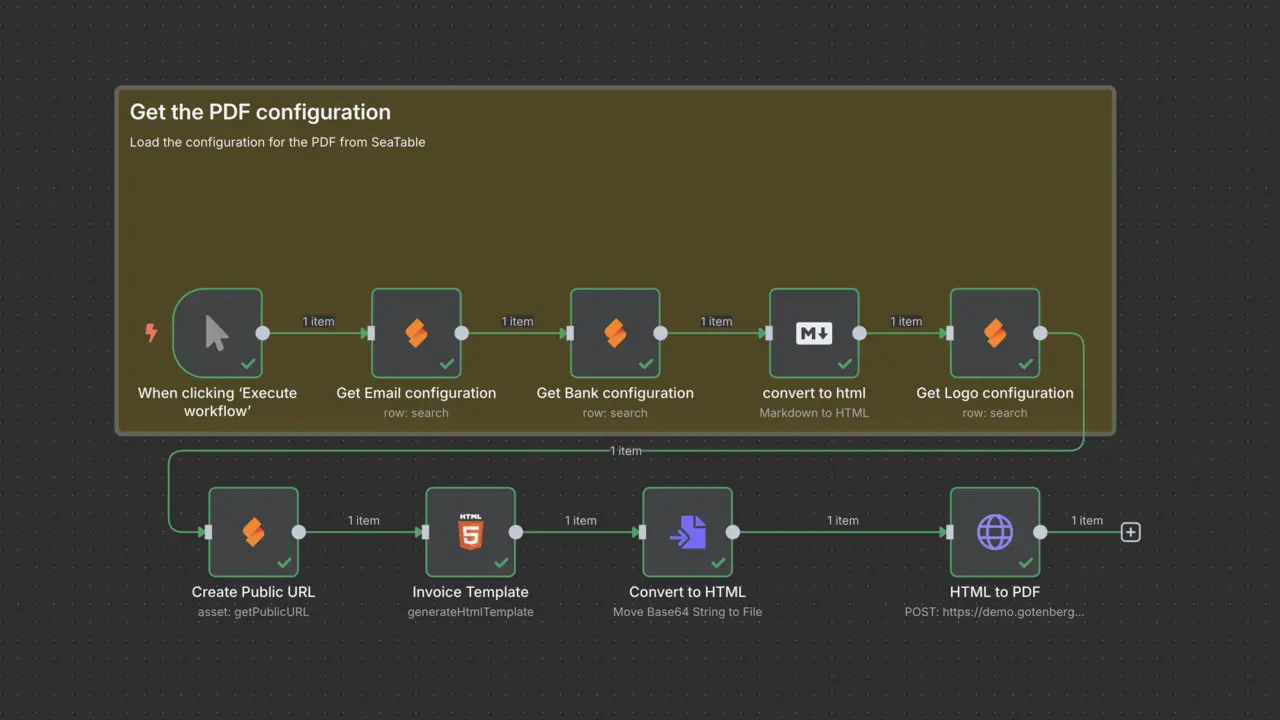
The complete workflow