
I’ve been working with n8n for years. Now that it’s getting quite popular, I am seeing more and more video tutorials and articles about how to use it, which is great. Unfortunately, due to the fact that everyone is trying to demonstrate the ease of use of n8n, they are forgetting to mention the parts about authentication. I get it—that part is boring, it takes time away from the actual demonstration of the automation, and making videos is hard as it is without thinking too much about the authentication part.
There are also creators that do mention the authentication part. Take the videos from Nate Hark for example, where he does mention the authentication part and how to use it.
I still want to create a post dedicated to this topic. You could argue that this is something that should be done by the creators of n8n, but this is not a shortcoming of n8n—it is your responsibility to secure your data. The same way as you would see it your responsibility to close and lock your door, right?
Like in the real world, you could have other measures in place to secure your data. n8n can’t force authentication on your webhooks and MCP Servers. It is your job to decide how and when to secure your access (always—you always have to secure access).
Webhooks and MCP Server
Webhooks
Let’s first start with webhooks. When you drop in a webhook trigger in n8n, it will by default look like this:
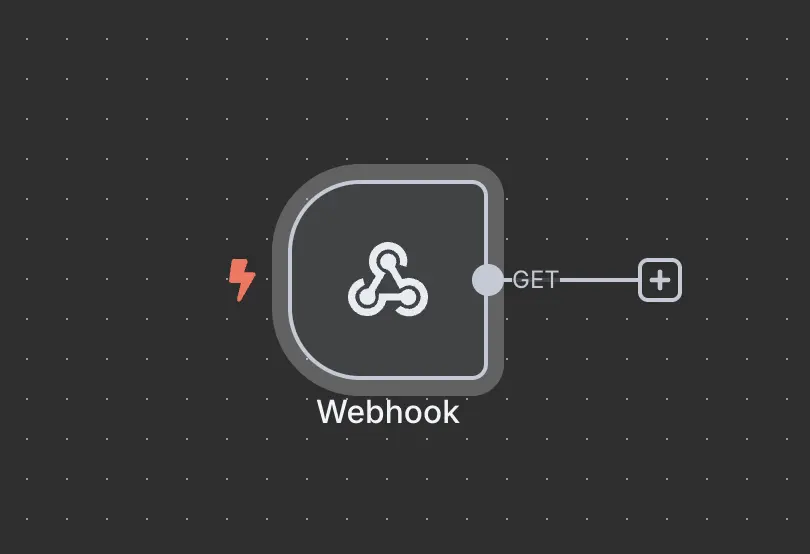
n8n Webhook trigger
Looking at the details, you will see that the authentication is set to None.
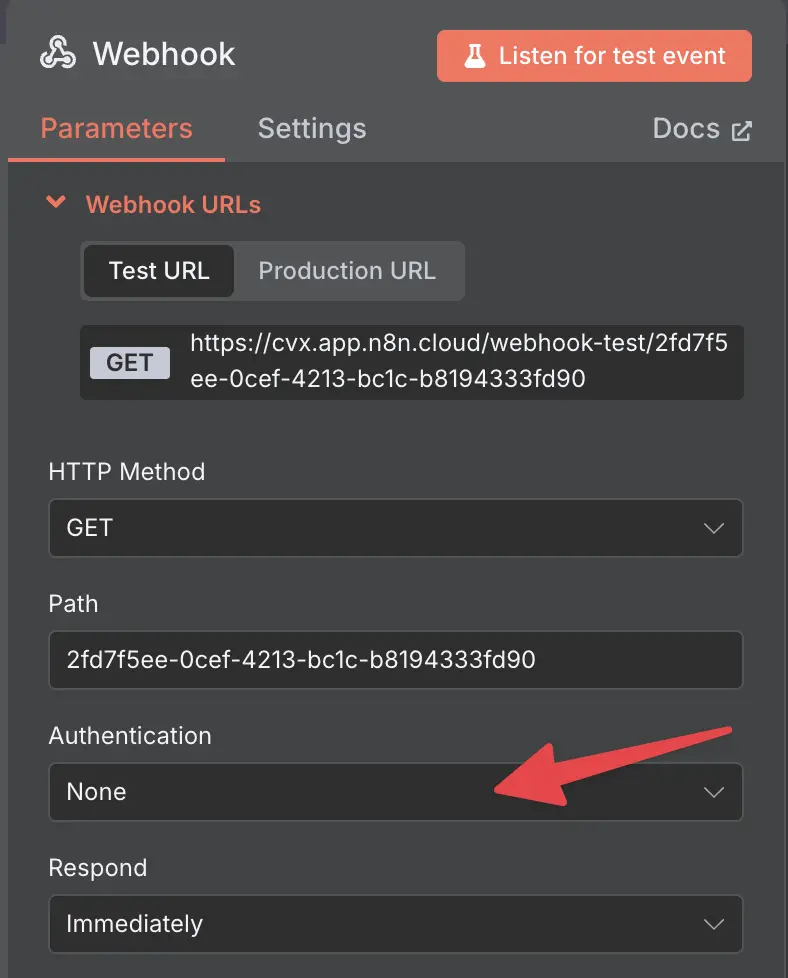
n8n Webhook trigger without authentication
What this means is that anyone with the URL from the webhook will be able to trigger this workflow and potentially access your data.
Let me demonstrate this with a simple example. I have added a node that will return some secret text.
curl https://cvx.app.n8n.cloud/webhook/2fd7f5ee-0cef-4213-bc1c-b8194333fd90
{"secret":"this data is secret and should not be public"}
Ouch, that’s not good. Our super secret data is now publicly available.
Adding authentication
Adding authentication is super easy, but as always, it depends on what options you have in the tool that is calling the webhook. Typically, you would go with header-based authentication. This means that you define the header as well as the value that should be sent from the tool that is calling the webhook.
To add header-based authentication, you would go to the webhook trigger, click on Authentication,
and select Header Auth.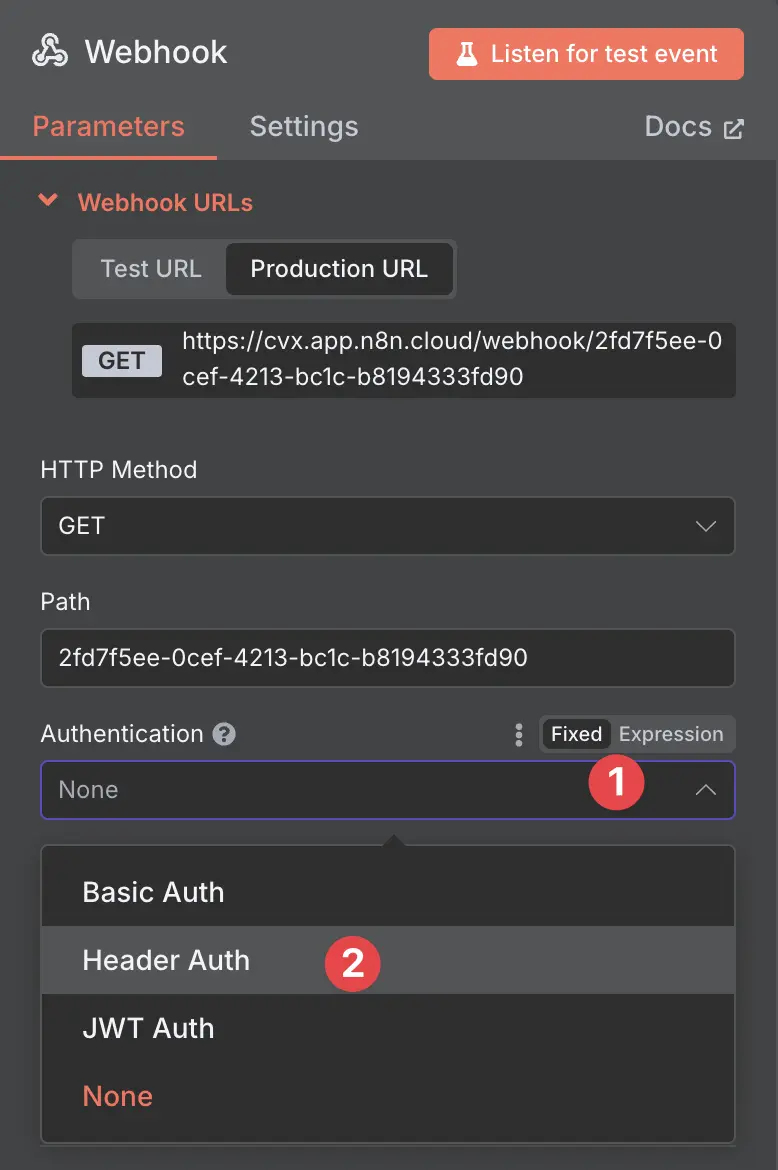
adding authentication to webhook
Then, if this is the first time you are adding authentication, you will be asked to add a new header.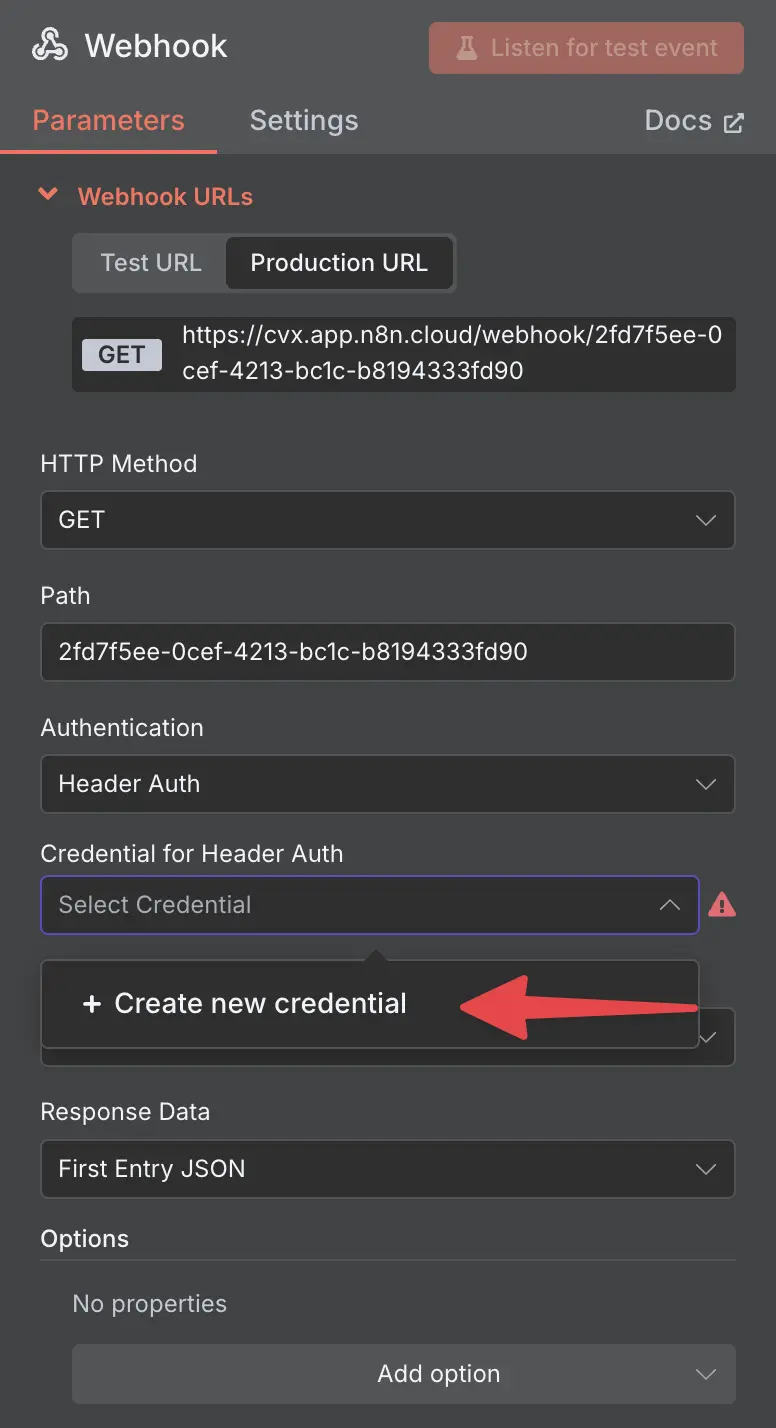
creating a new credential
Now you can add the header and the value that should be sent from the tool that is calling the webhook. You can use whatever header name and value you want; you just need to use the same header and value when calling the webhook.
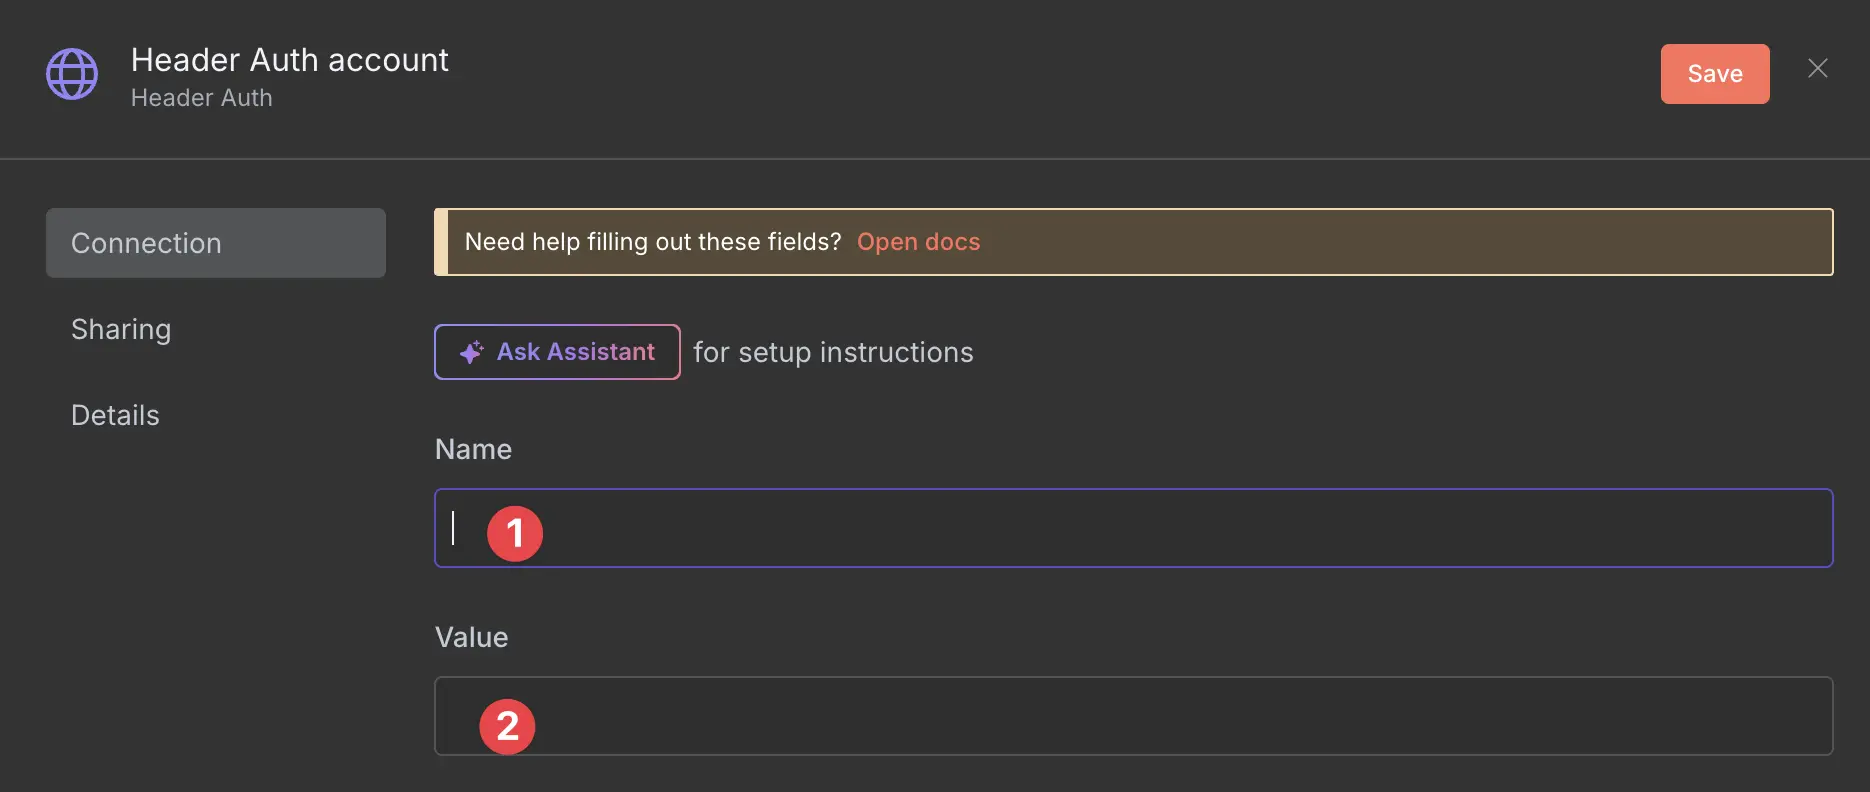
new credential settings
In this example, I am using the header Authentication and the value SuperSecretPassword.
Please, never use this bad password in production—it is just an example.
Now just save, and you are good to go.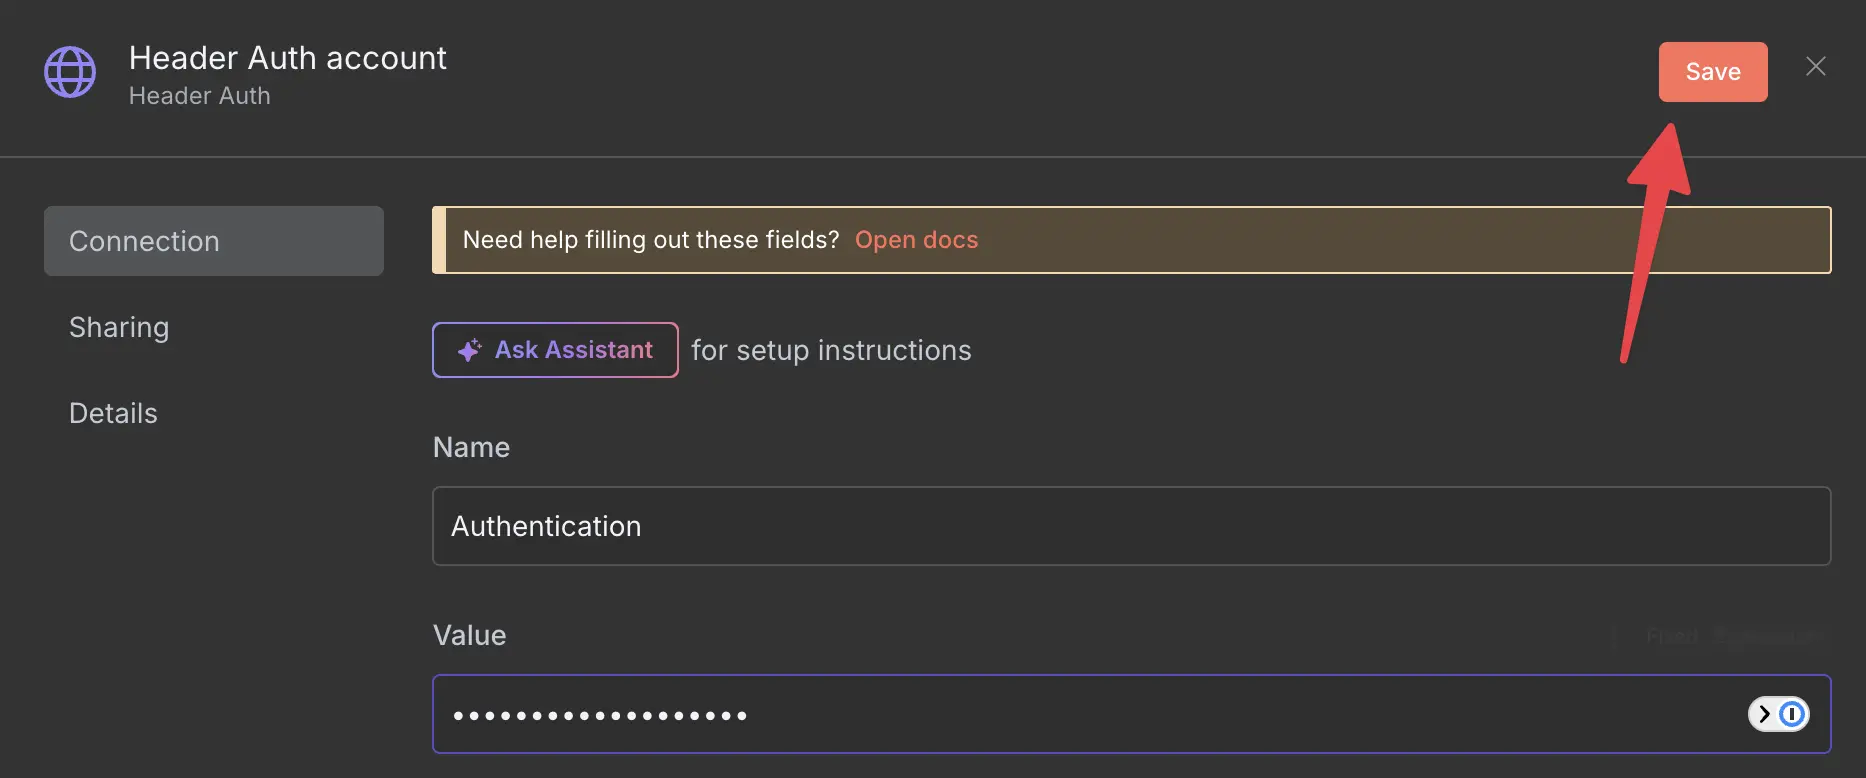
Please never use this password
The webhook will now be secured with the header Authentication and the value SuperSecretPassword,
which is a terrible password but better than leaving it completely open.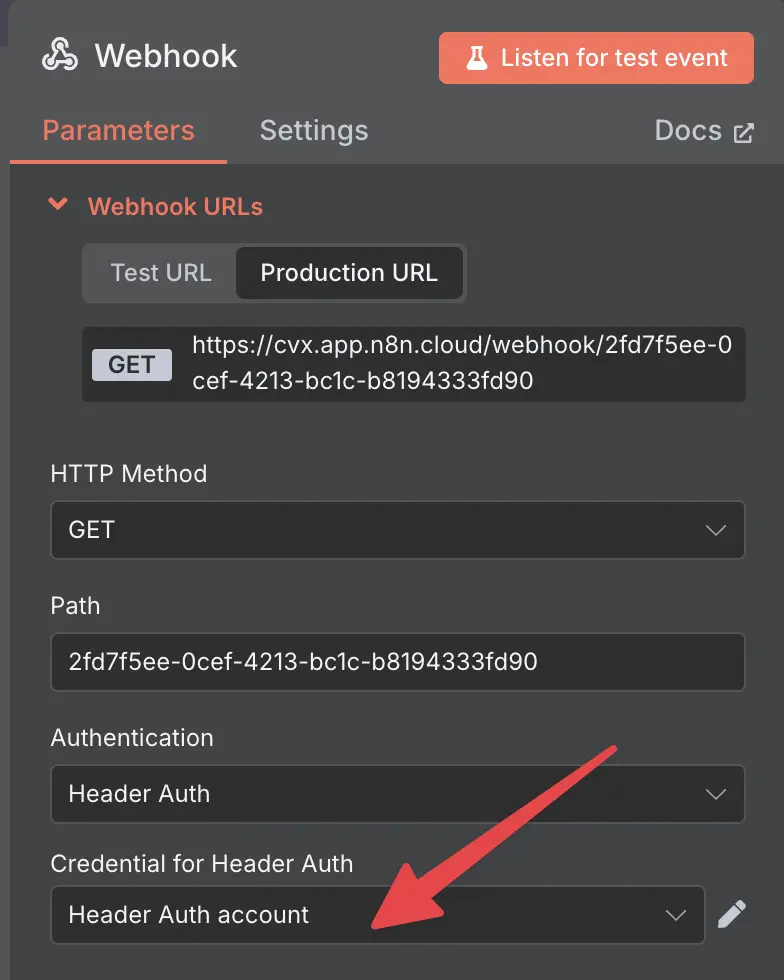
webhook with Authentication
So, let’s try this again.
curl https://cvx.app.n8n.cloud/webhook/2fd7f5ee-0cef-4213-bc1c-b8194333fd90
Authorization data is wrong!⏎
Much better! Now we can see that the webhook call is rejected if the header is not correct or, in this case, missing.
Using header-based authentication
I get it—I’m explaining here how to use header-based authentication, which is super simple in n8n, but showing examples on how to use it with curl, which for most people might be very confusing. Unfortunately, it depends on what tool you are using; the setup is different. With this curl example, I am just trying to let you see how n8n is responding in each case.
curl -H "Authentication: SuperSecretPassword" https://cvx.app.n8n.cloud/webhook/2fd7f5ee-0cef-4213-bc1c-b8194333fd90
{"secret":"this data is secret and should not be public"}
🎉 Success!
The secret data is now being returned, but only if the header is correct.
In curl, you would add the header with the -H flag: -H "Authentication: SuperSecretPassword".
In your tool of choice, the setup will be different, but most likely there will be
header name and value fields.
MCP Server
Now to the MCP Server—the setup here is basically the same as the webhook setup.
This time, however, we will use the Bearer Auth option.
Adding authentication
The bearer auth in this case is almost the same as the header auth, but instead of adding a header, you would add a bearer token. It sounds complicated, but it is actually very simple. Just think of the token as a password that you define.
Now create a new MCP Server trigger and select Bearer Auth in the Authentication section.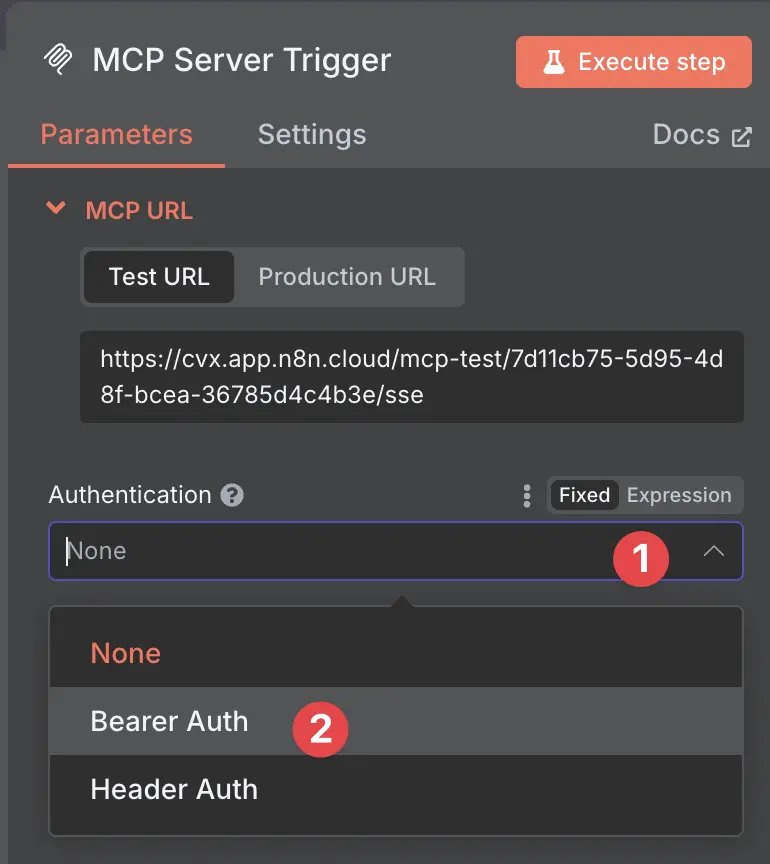
n8n MCP Server trigger
Click on new credential and add a new credential.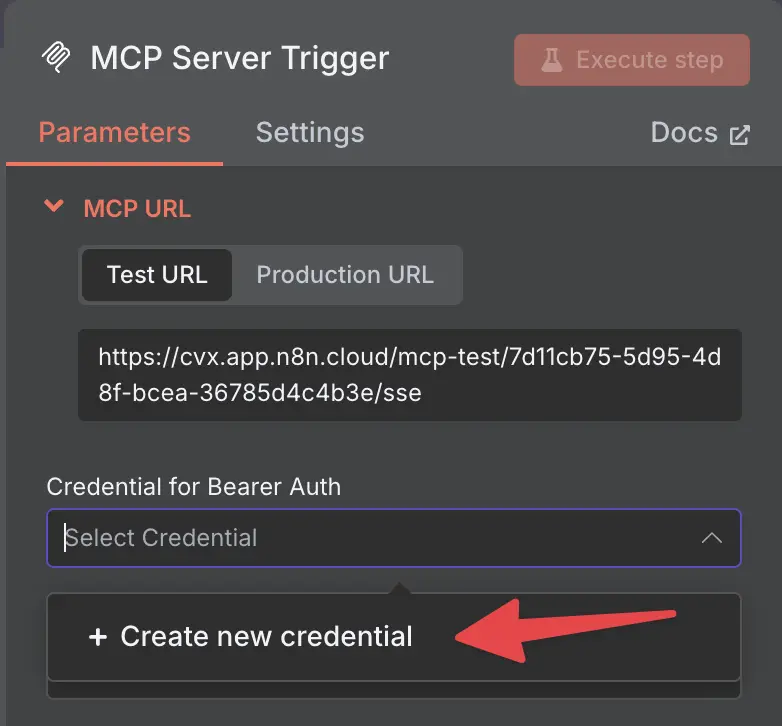
adding a new credential
Get your hands ready, and hit that keyboard to generate a long random string, or even better, use a random password generator—
something like this: dXL6SCTazoYC6BF6d087UMNsYQTZJgsNutV
Now take that random string, put it in a text editor of choice, and add the word Bearer in front of it.
It should now look like this: Bearer dXL6SCTazoYC6BF6d087UMNsYQTZJgsNutV
Copy the whole thing and paste it into the token field in n8n.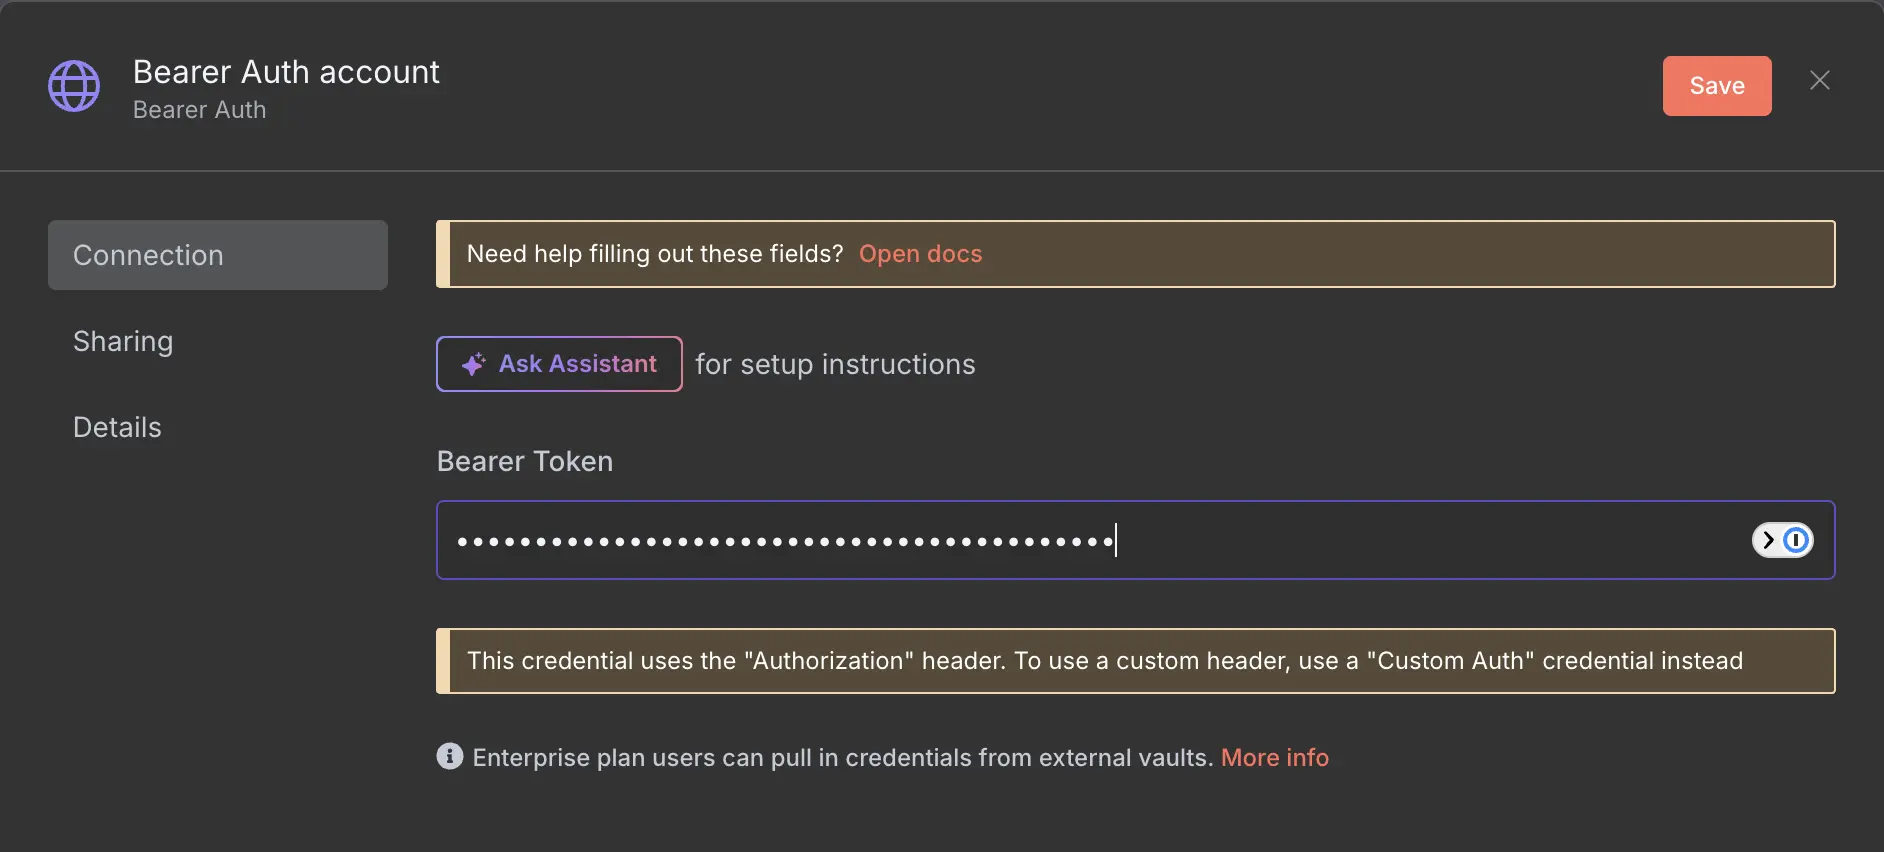
adding bearer auth to MCP Server
And that’s it—you have now added bearer auth to your MCP Server.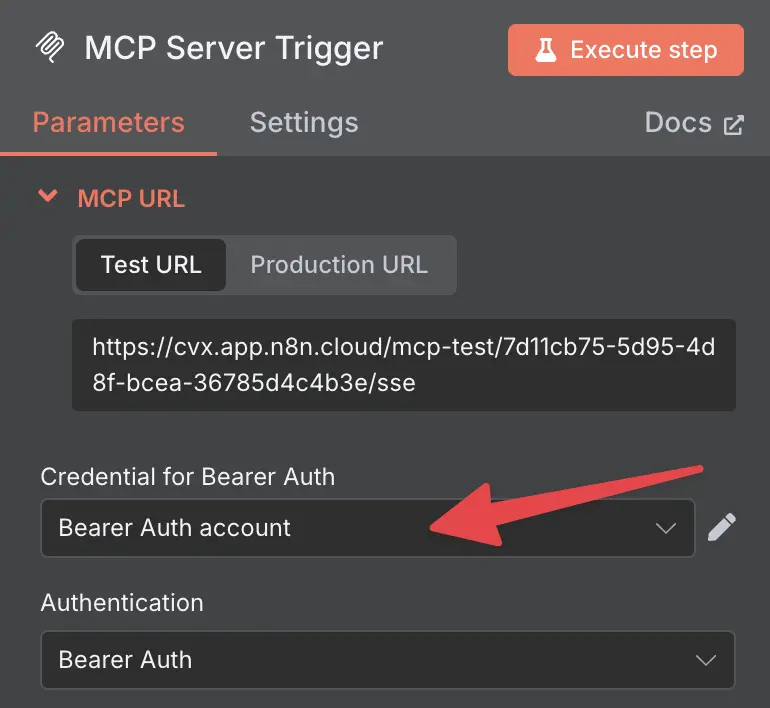
MCP Server with bearer auth
Using this in Claude Desktop
To use this in Claude Desktop, you will need to update the Claude Desktop settings
in the file claude_desktop_config.json.
You can find details about where to find the file in the official MCP documentation.
Additional information can also be found in the n8n documentation.
Here’s an example of the configuration file:
{
  "mcpServers": {
    "n8n": {
      "command": "npx",
      "args": [
        "mcp-remote",
        "https://foo.app.n8n.cloud/mcp/7d11cb75-5d95-4d8f-bcea-36785d4c4b3e/sse",
        "--header",
        "Authorization: Bearer ${AUTH_TOKEN}"
      ],
	  "env": {
	    "AUTH_TOKEN": "dXL6SCTazoYC6BF6d087UMNsYQTZJgsNutV"
	  }
    }
  }
}
A general note about authentication
Authentication is also a very common thing that is required in multiple tools. If these tools have a node in n8n, you will be required to add authentication to that tool. n8n in this case will take care to keep the authentication secure and encrypted. But since n8n is so flexible, you can also use HTTP nodes to call other tools, and if these tools require authentication, you might be tempted to add an HTTP header to the node. Please never do this, and use the authentication options that are available in n8n instead. I have written about this in the n8n forum after seeing that people accidentally posted their workflows with their authentication details.
Your Next Steps
- Audit your current n8n workflows - check every webhook and MCP server for missing authentication
- Implement header or bearer auth on any unsecured endpoints
- Document your authentication setup for your team
Need help implementing these security measures? Book a consultation and let’s secure your automations together.
Photo by Max Bender on Unsplash